Keep Me Home If I'm Sick Flyer
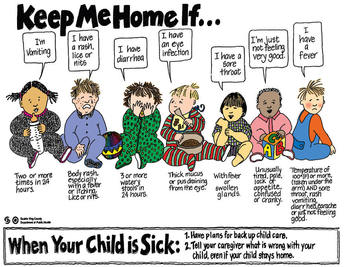
Printable Flyer -color flyer
http://pwoodw6715.com/HomeAwayFromHome/keepmehomeif.htm
Printable Flyer -Black & White-no color flyer
http://nqacc.org/docs/Keep_Me_Home_If.pdf
http://pwoodw6715.com/HomeAwayFromHome/keepmehomeif.htm
Printable Flyer -Black & White-no color flyer
http://nqacc.org/docs/Keep_Me_Home_If.pdf
Flexcon School Supplies

This Place Is Fabulous and FREE!
As a Teacher or Day Care Provider you can go here and receive FREE laminate paper in all colors and other items too. And did I say it's FREE!
You can take as much as you want and it's all FREE! Yup Free. Free is my most favorite word. If anyone knows of any other places that donate free school and craft supplies pleae email me and let me know and I will post it. Please , Please let me know where I can get Free stuff!
FLEXcon's School Stock program provides local non-profit groups with thousands of dollars in free supplies every year. We donate outer wraps, end rolls and aged sample stock of our self-adhesive material through this program to teachers and other individuals from not-for-profit organizations. This keeps large amounts of material from being needlessly incinerated each year.
Various colors and styles of material are available on a first come first served basis. Because this is a self-serve service and material moves in and out of this area quickly, we cannot verify if a specific material is available.
FLEXcon's School Stock pick-up is located in manufacturing Plant 3 of our Spencer, MA campus. From the Rt 9 entrance near our electronic sign take a hard left toward the security gates. Go through gates and bear right up the hill to enter the Plant 3 parking lot. Look for the glass sliding doors marked school material pick-up. Ring the buzzer and wait for assistance.
School Stock Hours:
Monday - Friday, 9am - 4pm
Saturday, 8am - 12pm
Please note these hours may vary during the observation of certain holidays.
Address:
1 Flexcon Industial Park
Spencer, Mass. 015262-2642
If you have any questions, you can reach us at (508) 885-8200.
From Worcester:
Take Route 9 through the center of Spencer. Approximately 1 mile beyond center, turn left at the Hess gas station/McDonald's Restaurant onto South Spencer Road. FLEXcon is the first building on the left.
From Boston:
Take Mass Turnpike (Route 90) West to Sturbridge, Exit 9. Take Route 20 East for approximately 1 mile. Turn left onto Route 49. Go North to the end of Route 49. Turn right onto Route 9 East for 1/4 mile. Turn right at the Hess gas station/McDonald's Restaurant onto South Spencer Road. FLEXcon is the first building on the left.
From Springfield:
Take Mass Turnpike (Route 90) East to Sturbridge, Exit 9. Take Route 20 East for approximately 1 mile. Turn left onto Route 49. Go North to the end of Route 49. Turn right onto Route 9 East for 1/4 mile. Turn right at the Hess gas station/McDonald's Restaurant onto South Spencer Road. FLEXcon is the first building on the left.
From Hartford:
Take Route 84 (formerly 86) East. When you enter Massachusetts, you will exit in Sturbridge at the Route 20 East exit. Follow Route 20 East for approximately 1 mile. Turn left onto Route 49. Go North to the end of Route 49. Turn right onto Route 9 East for 1/4 mile. Turn right at the Hess gas station/McDonald's Restaurant onto South Spencer Road. FLEXcon is the first building on the left.
PLEASE NOTE: As this is a manufacturing facility with heavy equipment traffic, for your safety, we respectfully request that you not bring children with you to pick up school stock material. During your visit proper footwear is required. Please refrain from wearing flip-flops or sandals.
You can also visit me on http://www.pinterest.com/guylainelabbe/ .There are lots more Craft Ideas and Preschool and so much more.
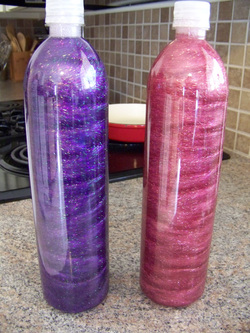
Relax Bottle/Time Out Timer (by My Crazyblessedlife.com)
Use a Smart water bottle (Smart water was the brand) that was totally smooth and not too big around for little hands to hold.
I removed the label with goo gone (it was very sticky under that label)
Next I filled each bottle with about 3/4 (* edit 5-3-12, I used hot water so that the glue “melted” better, room temp or cold will cause it to stay separate) water, an entire bottle of glitter glue and a small tube of ultra fine glitter. I kept playing with the mixture until the glitter settled at about 5 min. I added more clear by CouponDropDown" gel glue to make it go slower or more water to make it settle faster. Then I had my sweet husband (who knows when I handle glue I tend to glue body parts together accidentally) to super glue the lids on. Another thing I didn’t like about the mind jars I saw, the mason jars were not glued shut and knowing my kids they would just open them and spill or drink them (glue and glitter… not something I want my kids drinking). Here are the finished jars.
Here is one settled and one in the beginning stages of settling…
Here is one of the bottle half settled at 2 1/2 minutes and the other totally settled. Sorry they are purple and pink, those are my girl’s favorite colors (right now) but you can make them with any color glitter. Boys blue or green ones would be really cute too.
Here are some of the products I used to make them.
Now time out in my house looks more like this….. and I love it
It is quite relaxing to watch. Maybe the kids can take a few minutes before bed to watch it, calm down and be ready for bed. (there are more pics to view at the website below.)
http://mycrazyblessedlife.com/2011/10/03/relax-bottletime-out-timer/
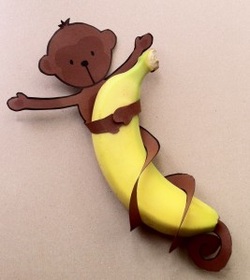
Banana Monkey Printable
by Diy Inspired
How to:
1. Print this simple design on craft paper or brown paper.
2. Cut around the monkey and cut out the tail into a spiral.
3. Curl the tail around a banana.
4. Fasten the little feet with a staple or small piece of tape.
Free Download: just click on simple design
Easy Monkey Banana Treats by Anneke van de Langkruis
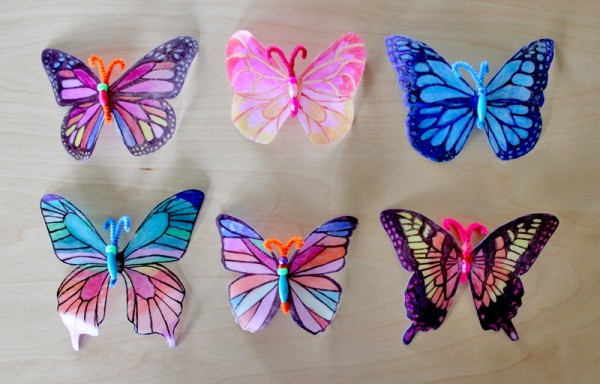
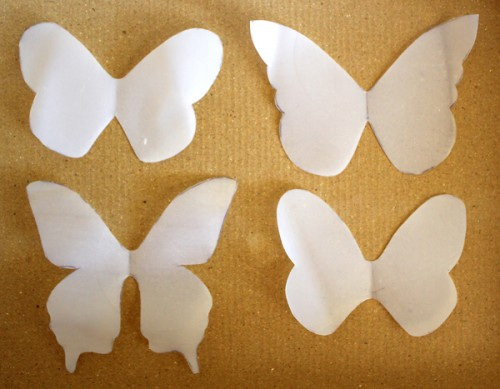
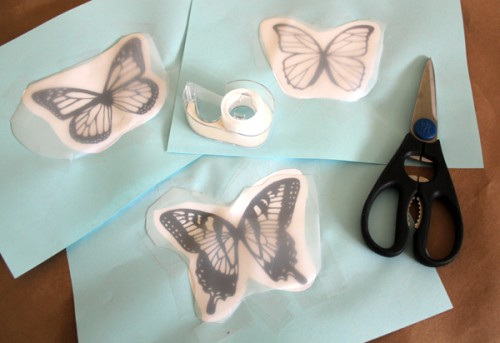
Butterfly

This adorable butterfly used the child's face and hands. Parents just love pictures and handprints. I believe this was made as part of the Mother's Day gift.
Butterfly Feet
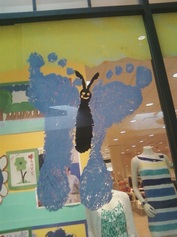
I saw this in a store front over the summer and thought it was cute.
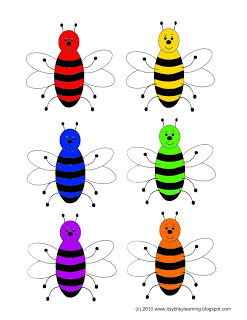
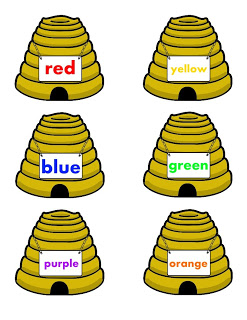
Bee Color Match Printable (By itsybitsylearners.com/)
Use this cute activity to promote the learning of color words and color recognition. Have your child match the bee to its correct hive!
Click here to download now!
http://itsybitsylearners.com/2010/05/freebie-bee-2-hive-color-match/
Click here to download now!
http://itsybitsylearners.com/2010/05/freebie-bee-2-hive-color-match/
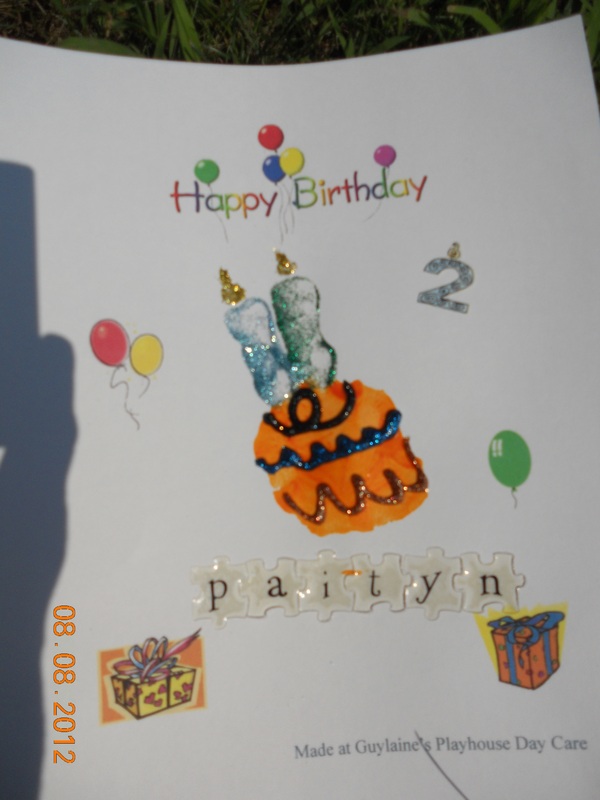
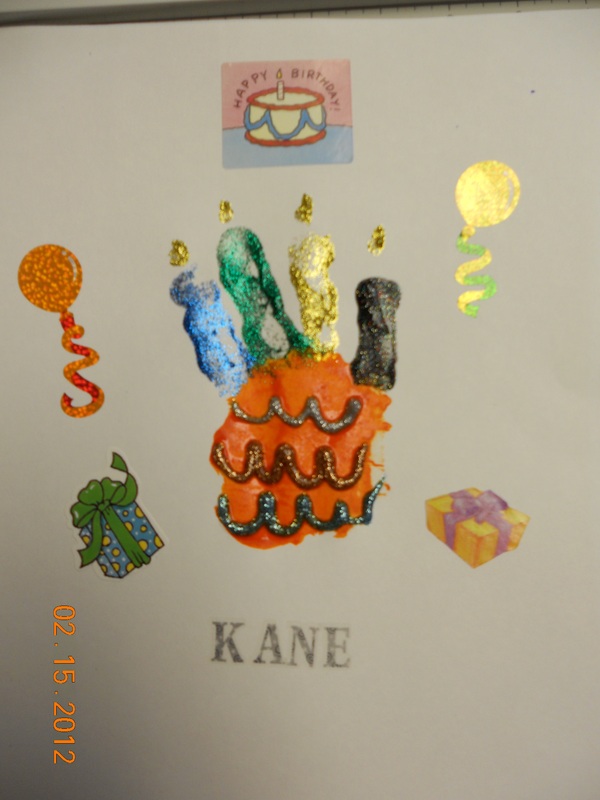
Happy Birthday Jack
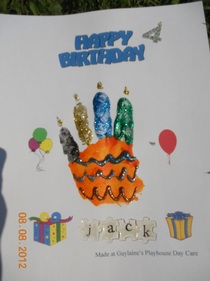
For every Birthday the child makes this Hand Print Cake. The number of fingers used is the age.
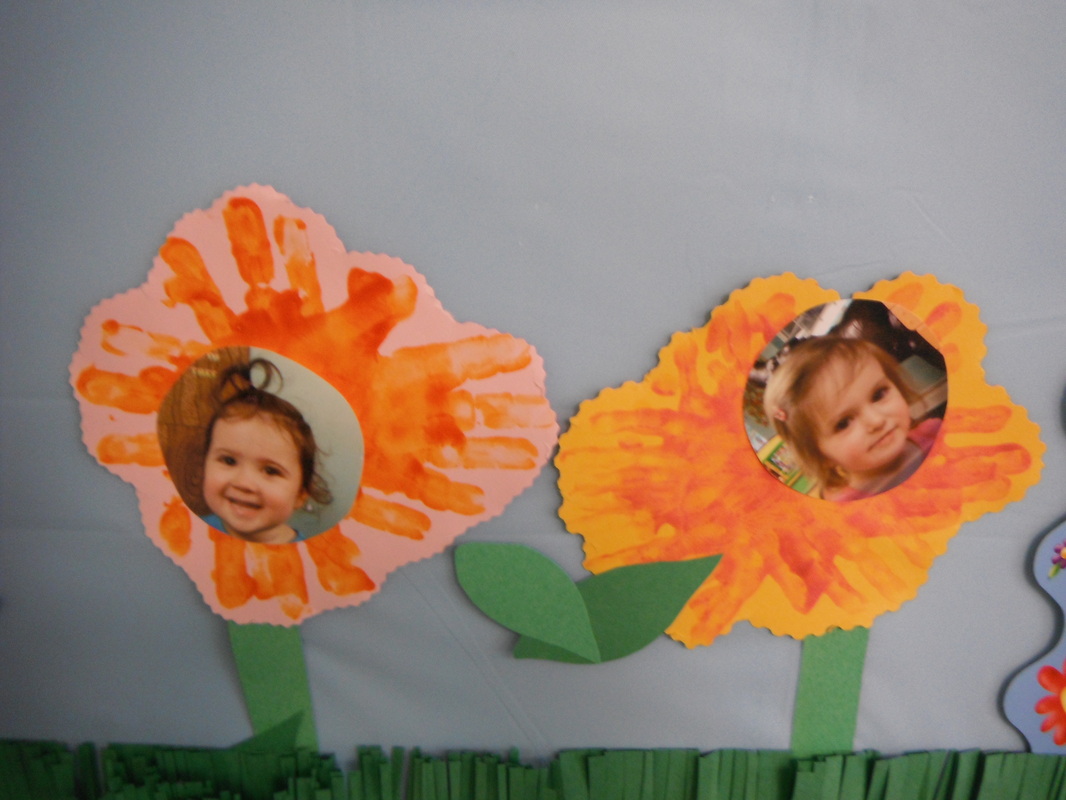
Flower Child
The photos below were on a bulletin board for May 2012. The children painted their hands & glued on a photo.

Octopus
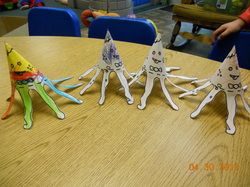
I will add link soon.
Summer Time Swimmers
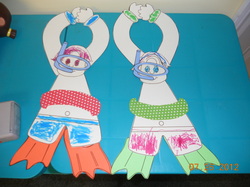
I printed out a bunch of different colored tubes, flippers & goggles. The children colored the swim suits and hair. They hang on a door.
https://www.dltk-holidays.com/summer/msummerdoorknob.htm
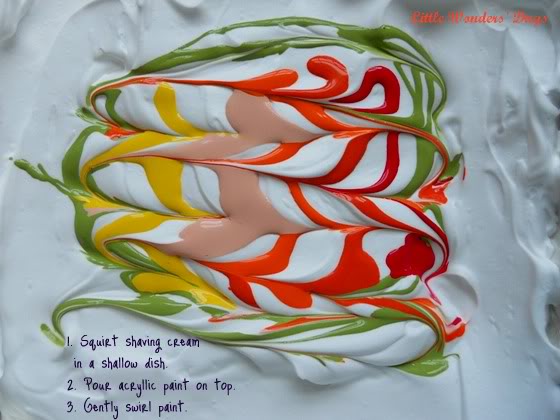
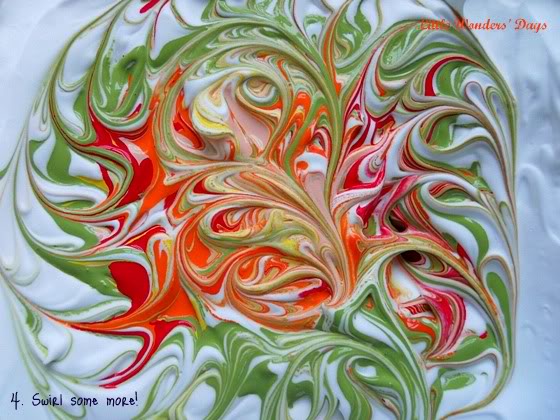
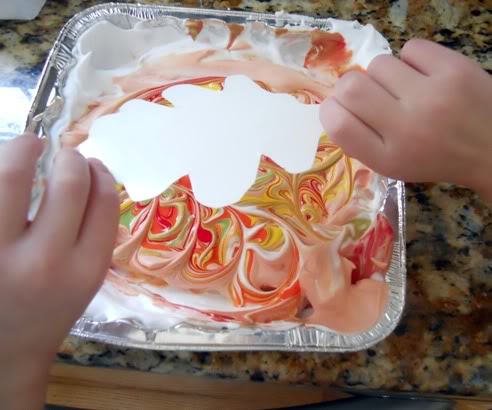
Painting with Shaving Cream (Little Wonders Days)
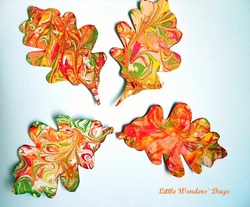
Shaving Cream Leaves. They are so beautiful. I have done this with Holiday card envelopes and Birthday too. Each envelope is different. Use the season colors.
It smells nice too.
http://littlewondersdays.blogspot.com/2011/08/back-to-school-fall-friday-fun.html
It smells nice too.
http://littlewondersdays.blogspot.com/2011/08/back-to-school-fall-friday-fun.html


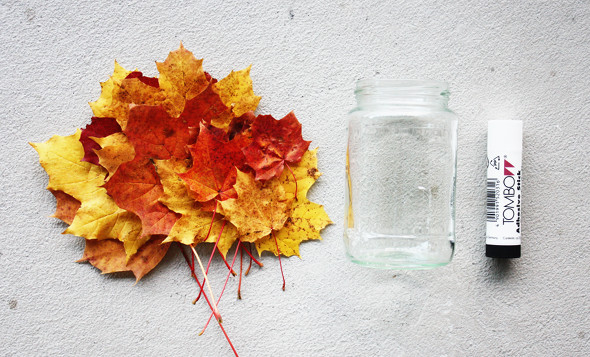
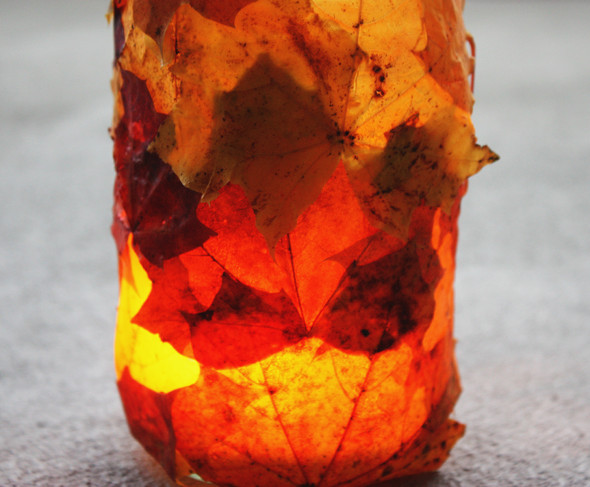
Fall Lantern (by diy)
Easy for anyone to do!! Love this idea!!
The fall is a beautiful time of the year with strong colors everywhere. Why not bring the fall inside your home? With a glue stick and a jar you can easily make your own fall lantern!
First I collected leaves in different colors and used a glass jar and a glue stick. I put glue on the outside of the jar and then I put glue on each leaf before I attached i...t to the jar. At the end I lit a tea light and put it inside the jar.

Transportation Theme
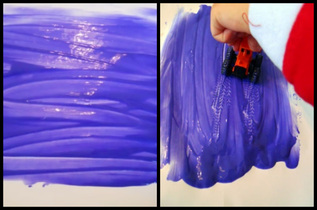
During Transportation Theme we try to find as many things as possible to drive our cars and trucks through. Paint works great to leave good tracks. Of course use the color of the month paint. We have also used shaving cream, playdough, mud, sand. You can easily wash everything when you are done. The kids take the tracks painting home. How easy is that. Fun and Easy, don't get any better than that. You can even let the children clean their own cars in the sink or water table.
"Car Wash"
"Car Wash"
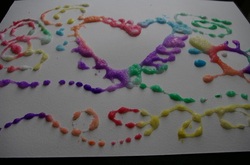
Raised Salt Painting
Raised Salt Painting
Have the kids squeeze a design that they like onto the board with white glue. Simple shapes, and designs seem to work the best for this project. Once their design is complete, shake table salt over the entire piece. Don’t be afraid to use a lot of salt, you want to make sure the salt covers all sides of the glue. Tap off the excess salt into a tray, to use again.
Now let the magic begin! Gently touch the tip of your wet paint brush to the salt. No matter how many times my kids do this they are amazed to watch the watercolor spread up the salt. Try not to “disturb” the glue by dragging your paint brush.
Once the glue is completely dry, your painting will sparkle beautifully. Unfortunately this project might not be well suited for the keepsake box since it does tend to flake off after a while, so take lots of cute pictures. Just remember art is often about the process and letting kids explore a new medium
http://www.housingaforest.com/raised-salt-painting/
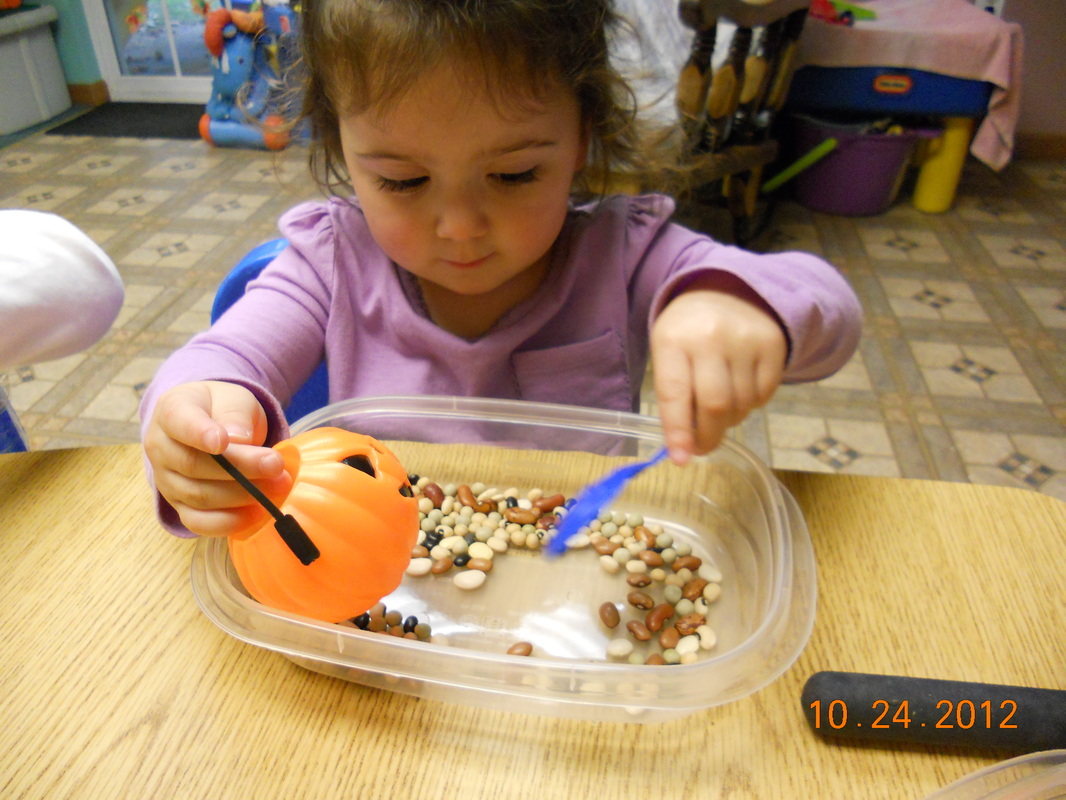
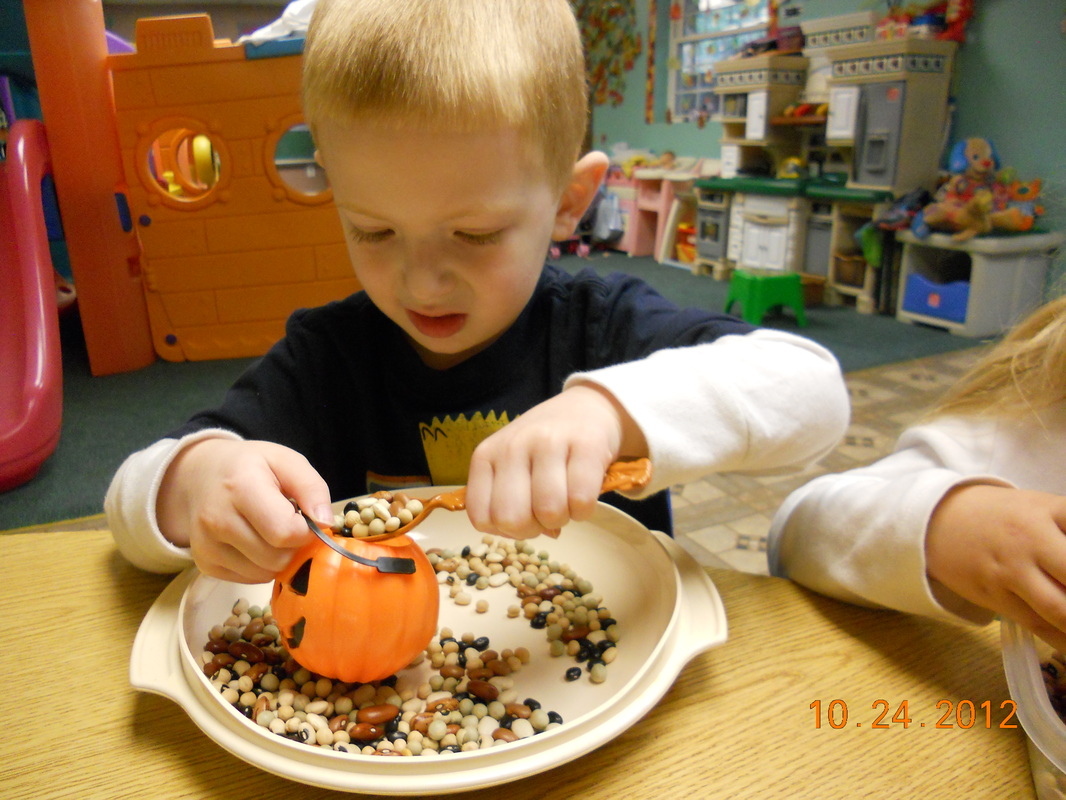
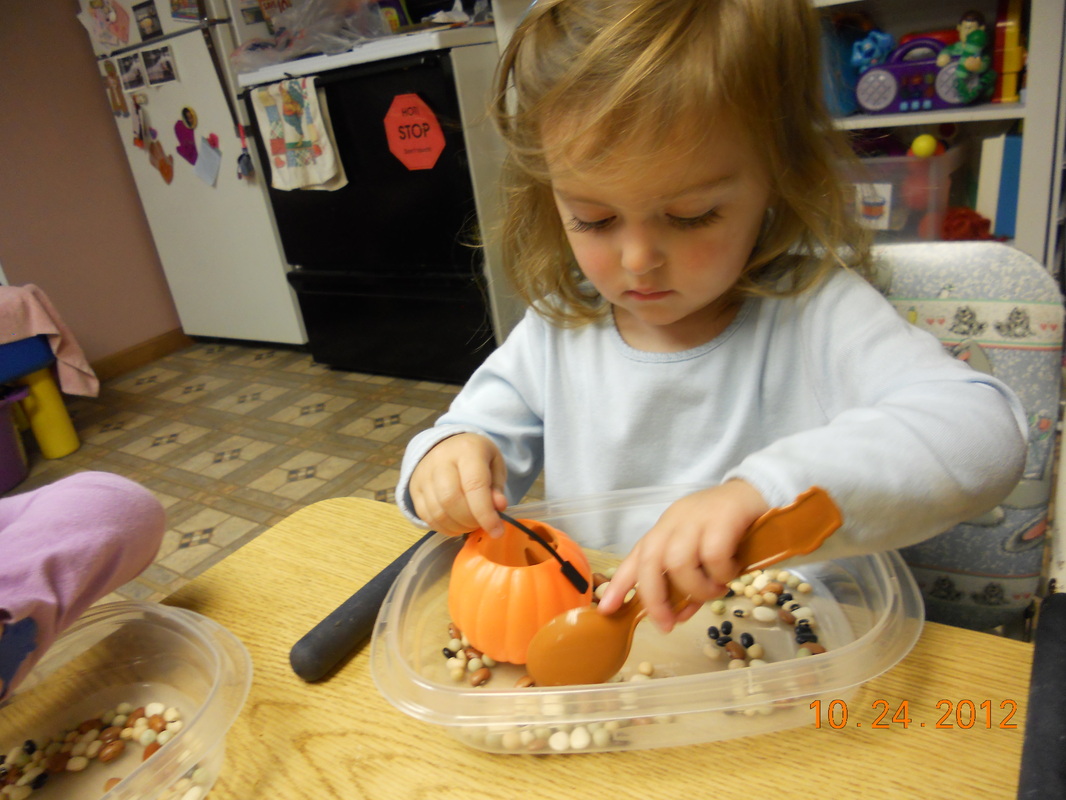
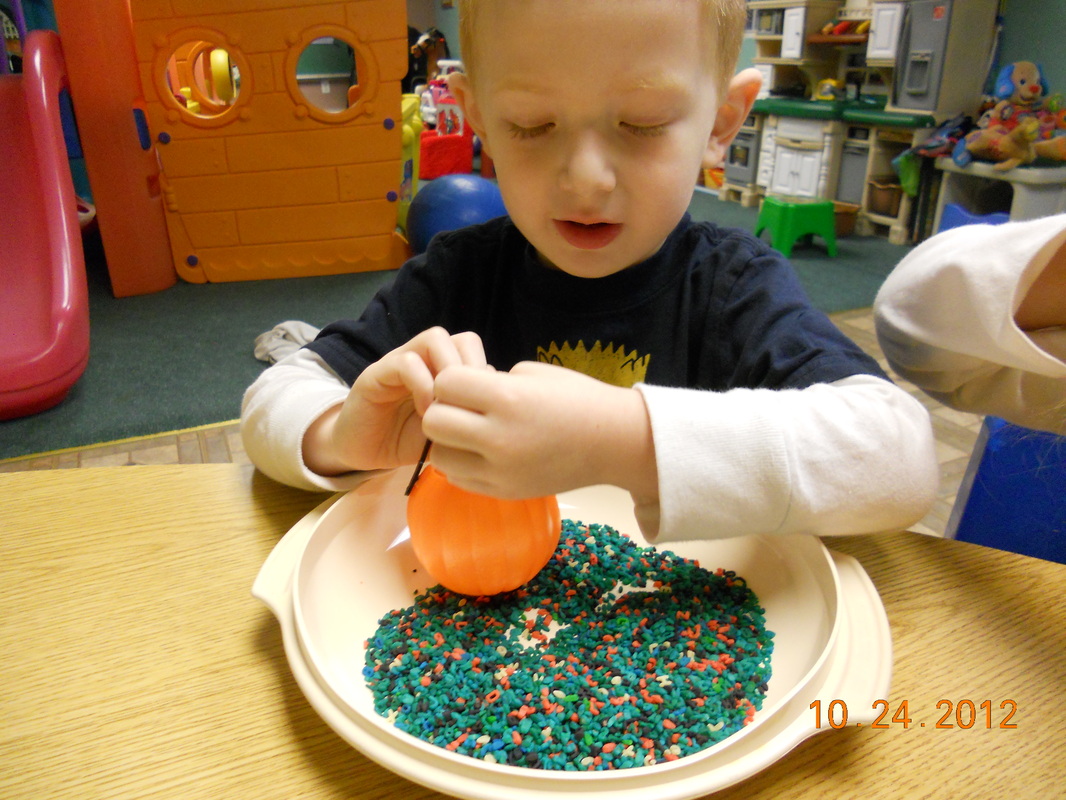
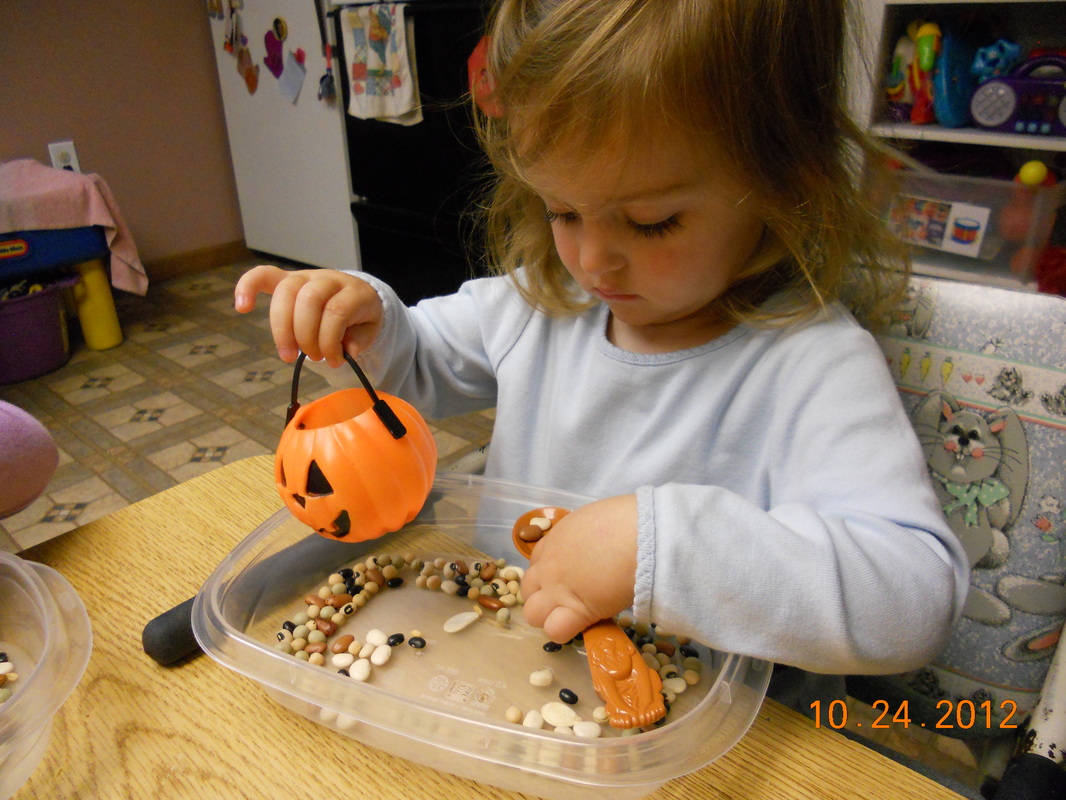
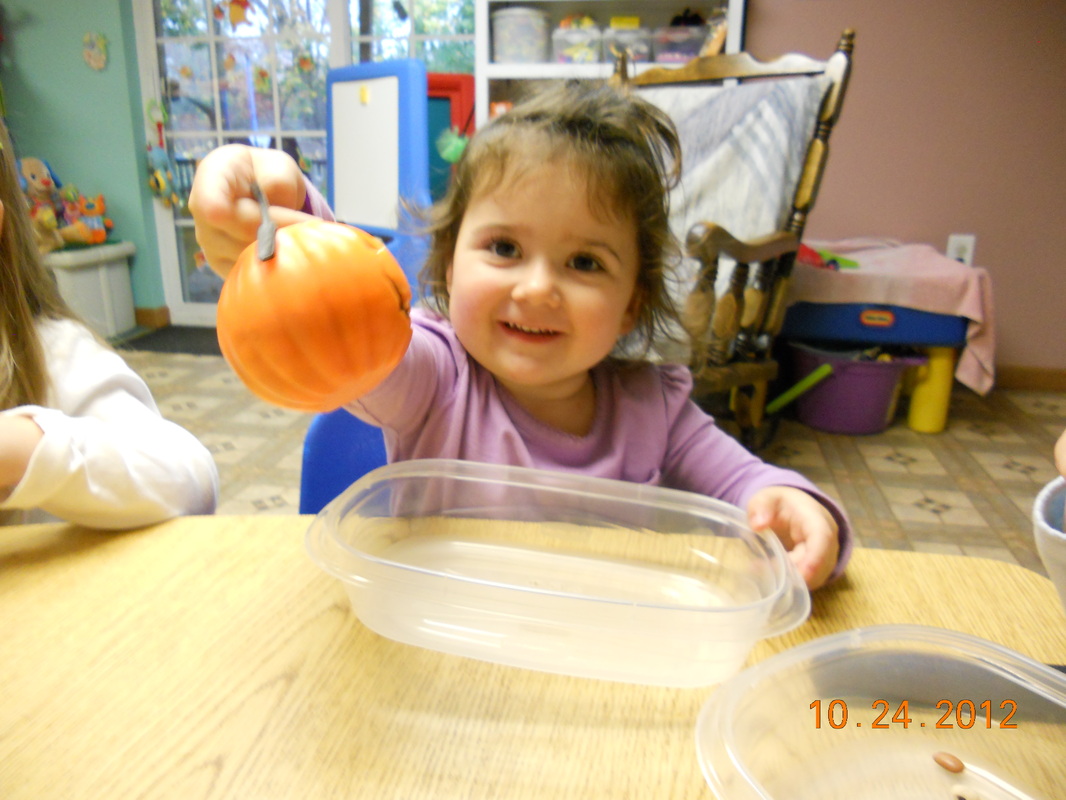
Fill a Pumpkin
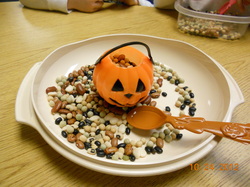
For small motor skills have children use a spoon and their fingers to fill their small pumpkin with seeds. I used beans, seeds, rice and colored ABC pasta.
Light Up Jack~O~Lanterns Milk Jug

Save those "Milk Jugs"... Halloween is right around the corner!!!
What you'll need
Clean plastic gallon milk jugs...
Black permanent marker
Craft knife
String of 50 clear low-wattage holiday lights (or use any color you like)
Draw silly eyes, nose and mouths (be creative) on the jugs. Tip: Leave the caps on while you do this, so the jugs don't dent.
Use the craft knife to cut a half-dollar-size hole in the back of each jug (a parent's job).
Arrange the ghosts near each other and string the lights between them, stuffing several bulbs into each of the jugs.
Light Up Snowman Milk Jug
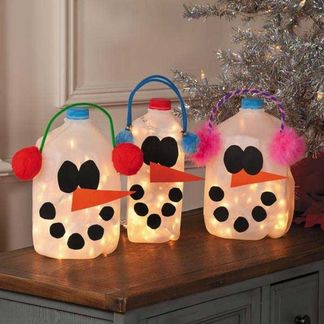
Make Santa proud! Recycle, Reduce and Reuse! Go green this Christmas by using recyclable milk jugs to create adorable Snowman Christmas decorations. Supplies
· Milk Jugs
· Chenille Stems
· Pom-poms
· Cardstock
· Adhesive
Instructions
1. From black cardstock, randomly cut eyes and mouth shapes; eyes should be larger than mouth pieces.
2. From orange cardstock, randomly cut triangles for nose.
3. Glue pieces to clean milk jug.
4. Glue chenille stems to both sides of milk carton creating an arch above eyes.
5. Glue pom-poms, jingle bells, etc. on the end of each chenille stem to create earmuffs.
http://www.freefunchristmas.com/wp-content/uploads/FNF_Christmas-Snowman-Milk-Jugs.pdf
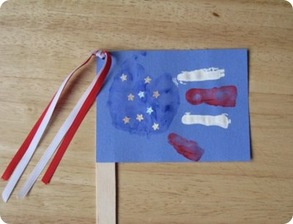
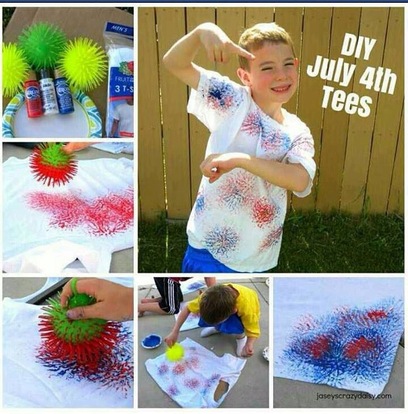
Hand American flag (by muffin tin mom)
*See Pics below
Supplies:
-red, white and blue paint
-blue construction paper
-paint brushes
-popsicle stick
-small star stickers
-glue stick
-scissors/paper cutter
-hole punch
-thin ribbon in red, white, or blue
Step to get you there:
1) Paint the palm of your child's hand blue and the fingers (not the thumb) red and white alternately (as shown in the photo below).
2) Place your child's hand, palm and fingers down, onto the construction paper and let dry.
3) Using scissors or a paper cutter, cut the construction paper to fit the handprint.
4) Have your child help you apply mini star stickers to the palm area.
5) Using a glue stick, have them apply glue to the top half of the popsicle stick (leaving room for little hands to grab the flag )
6) Punch a hole in the upper left corner of the flag, and string whatever combo of the thin ribbon you wish. Tie the ribbon off and you are ready to celebrate!
http://michellesjournalcorner.blogspot.com/2012/07/fun-fourth-of-july-ideas-for-kids.html

Fall Leaf Rubbing/ Turkey
*see pics below
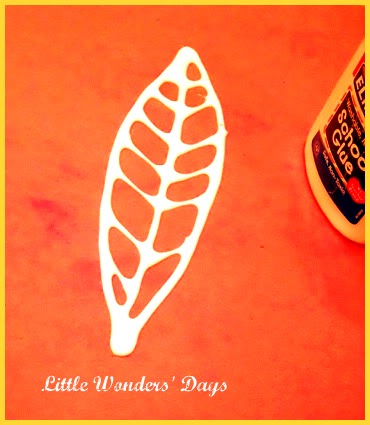
Homemade Feather Rubbing Plates to make a Turkey by littlewondersday
We're getting ready for turkey day!
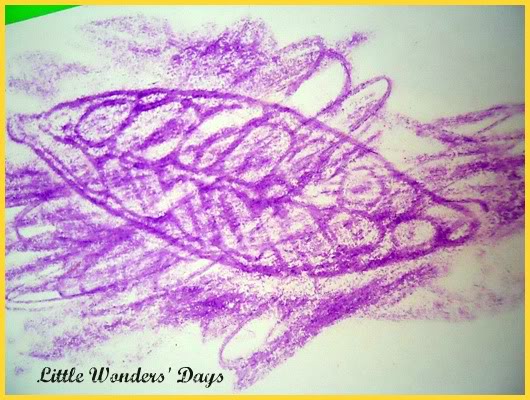
I made a rubbing plate in the shape of a feather using construction paper and school glue. I did the large shape first and once it dried went back and added more fine lines to look like the vanes on a feather.
I gave the kids some crayon rocks and showed them how to hold the paper still over the rubbing plate. One chose to use one color on each feather and tried to match the paper color. Some used every color of the rainbow on each feather!
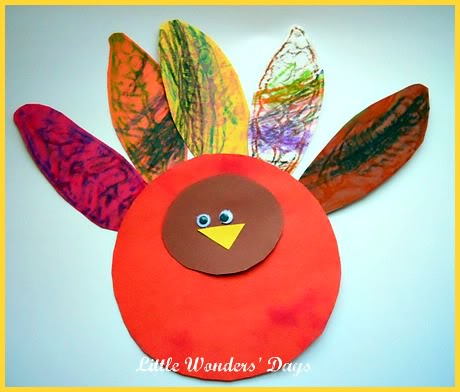
I cut their feathers out for them and they glued them to the body of their turkey. Older kids can cut them out themselves.
They added a head, some googly eyes, and a beak.
Gobble gobble!
http://littlewondersdays.blogspot.com/search/label/Thanksgiving
We're getting ready for turkey day!
I made a rubbing plate in the shape of a feather using construction paper and school glue. I did the large shape first and once it dried went back and added more fine lines to look like the vanes on a feather.
I gave the kids some crayon rocks and showed them how to hold the paper still over the rubbing plate. One chose to use one color on each feather and tried to match the paper color. Some used every color of the rainbow on each feather!
I cut their feathers out for them and they glued them to the body of their turkey. Older kids can cut them out themselves.
They added a head, some googly eyes, and a beak.
Gobble gobble!
http://littlewondersdays.blogspot.com/search/label/Thanksgiving


Tree of Hearts
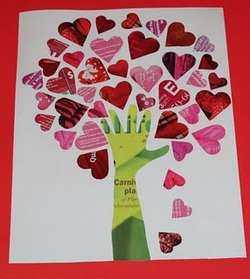
Great Mother's Day gift.
Tree of Hearts collage made of old magazines.
Trace hand and arm for the stem.
From puttiprapancha.blogspot.com
I have made this with textured scrap booking paper instead.
Tree of Hearts collage made of old magazines.
Trace hand and arm for the stem.
From puttiprapancha.blogspot.com
I have made this with textured scrap booking paper instead.
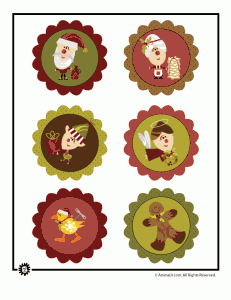
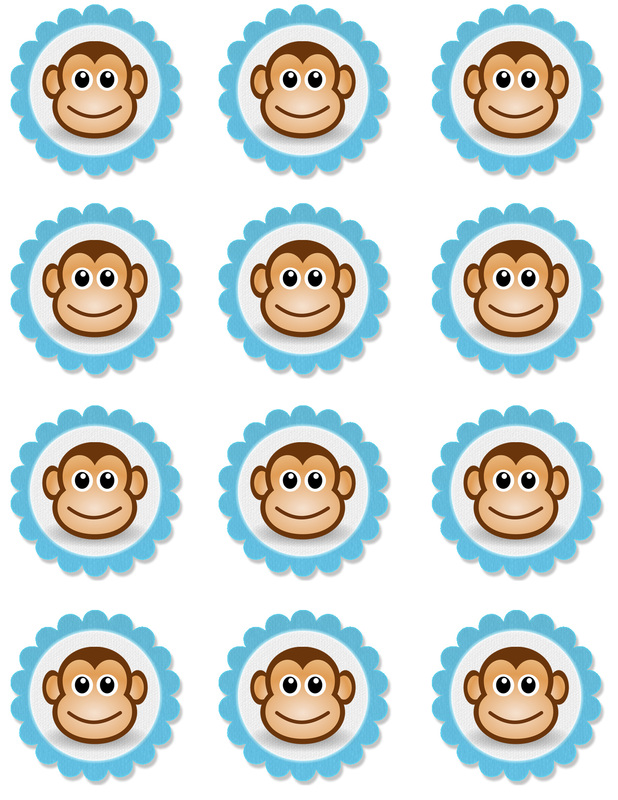
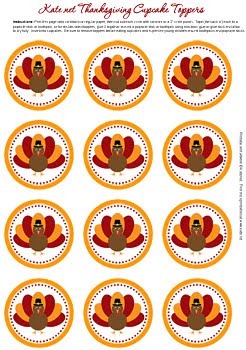
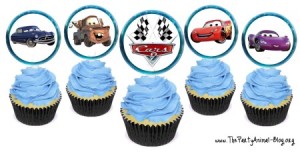
Printable Cupcake Toppers
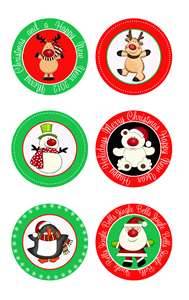
I use cupcake toppers at lunch time. I will make them ahead of time, according to our onth theme, and stick them into a sandwich or snack. I even print them out and use them for straw toppers too.
Pics are #1 being the picture to the right and then following below, first pic being #2, etc.
1-PuttingOnA PartyShop.com
2-Craftyjr.com
3-Karencookiejar.com
4-c2marcano.blogspot.com
5-partiesandholidays.blogspot.com
6-http://www.thepartyanimal-blog.org/disneys-cars-2-birthday-party-theme/
7-http://printablepartykits.com/kids-birthday-cupcake-toppers/
8-
More will be added as I find them. You can just do a google search for what ever your theme is and cupcake topper. For example: free printable christmas cupcake toppers.

Cupcake Toppers
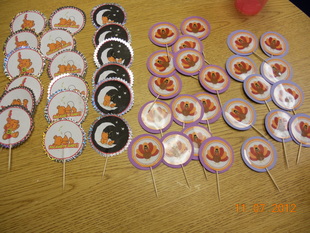
These are some of the toppers I recently made. We used the Rock a Bye Baby Bear ones in our Pigs in a Blanket lunch. The kids used it to also pick up their fruit and veggies. Again, it just makes lunch fun for those picky eaters.
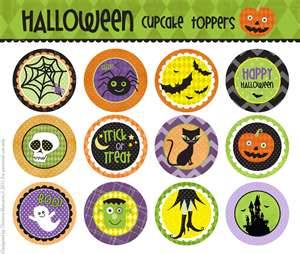
Jack-O-Lantern Picks (by skiptomylou.org)
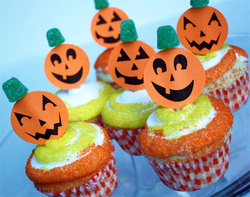
Here is a super quick and festive treat for Halloween! Download our free printable jack-o-lantern cupcake picks for some yummy fun!
Print this on orange card stock paper
http://www.skiptomylou.org/wp-content/uploads/2010/10/jackolantern-cupcake-toppers.pdf
Print this on orange card stock paper
http://www.skiptomylou.org/wp-content/uploads/2010/10/jackolantern-cupcake-toppers.pdf
Bunny cupcake toppers (by skiptomylou.org)
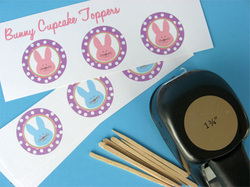
Here are some Easter toppers. Remember now you can use these for sraw toppers too. Just print and punch 2 small holes, 1 at top and 1 at the bottom and push a straw through. Now you lunch or snack will match your straw too.
http://www.skiptomylou.org/wp-content/uploads/2009/04/bunnycupcaketoppers.pdf
http://www.skiptomylou.org/wp-content/uploads/2009/04/bunnycupcaketoppers.pdf
Straw toppers or cupcake toppers
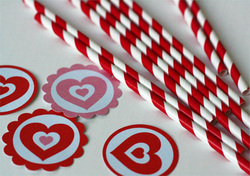
Download file, print in color on white card-stock, cut and tape to paper straws or for cupcake picks, sucker sticks or tooth picks. Cut circles with a 2-Inch scallop punch or for a plain edge a 1 3/4 to 2 inch circle punch.
http://www.skiptomylou.org/wp-content/uploads/2012/01/Valentine-Party-Circles.pdf
http://www.skiptomylou.org/wp-content/uploads/2012/01/Valentine-Party-Circles.pdf
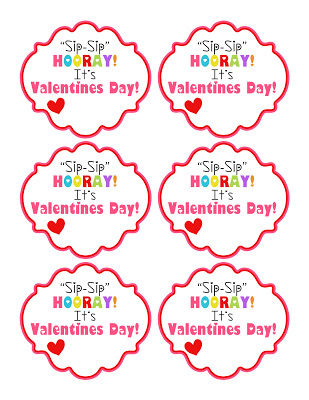
Sip-Sip Hooray! It's Valentine's Day

Dr. Suess Cupcake Toppers
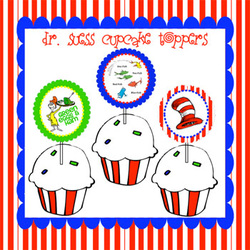
There are 2 links provided below. Not sure which one will work best.
http://search.4shared.com/postDownload/DXclB3pV/circletags_3.html
http://www.skiptomylou.org/2011/03/02/how-to-celebrate-dr-seuss/
http://search.4shared.com/postDownload/DXclB3pV/circletags_3.html
http://www.skiptomylou.org/2011/03/02/how-to-celebrate-dr-seuss/
At the Cupcake Express site there are 57 cupcake toppers to print. Check it out. Remember you can use them for straw toppers too.
http://www.etsy.com/shop/CupcakeExpress?section_id=7805225
Also at NickJr.com the are many connections to more straw toppers.
http://www.nickjr.com/home/search.jhtml?searchterm=straw+toppers
Lollipop Lily-Happy Valentine's Day Pop (by skiptomylou.org)
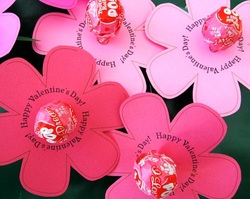
How cute is this and easy too. Great for a Valentine's Day Party.
http://www.skiptomylou.org/wp-content/uploads/2008/02/flower.pdf
This bottom link is for the leaf under the flower. see pic below
http://www.skiptomylou.org/wp-content/uploads/2008/02/leaf.pdf
http://www.skiptomylou.org/wp-content/uploads/2008/02/flower.pdf
This bottom link is for the leaf under the flower. see pic below
http://www.skiptomylou.org/wp-content/uploads/2008/02/leaf.pdf

Butterfly Valentine (byskiptomylou.org)
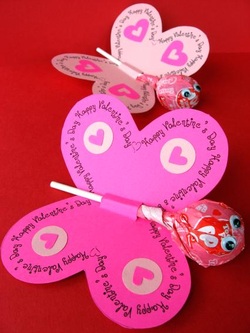
Download Butterfly Valentine ,print on colored card-stock, cut out, make slits for sucker, add some decorations (cut out shapes of paper, stickers, glitter, etc.), insert sucker and then add some wiggly eyes to the top of the sucker. Add a piece of tape to the back to keep the sucker securely in place.
http://www.skiptomylou.org/wp-content/uploads/2009/02/butterflyvalentine.pdf
http://www.skiptomylou.org/wp-content/uploads/2009/02/butterflyvalentine.pdf
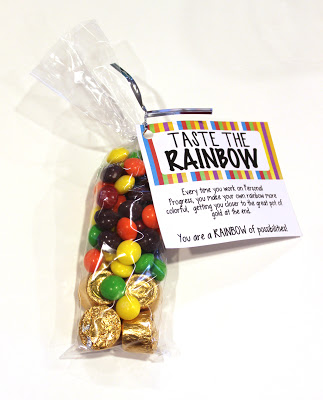
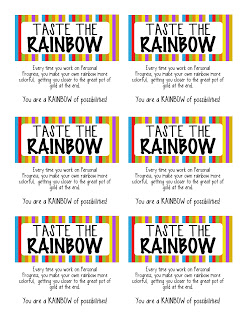
Taste The Rainbow (by Kinzieskreations)
I attached the tags to pretzel bags I filled with Rolo's and Skittles- the pot of gold under the rainbow. They thought this was really cute.
http://kinzieskreations.blogspot.com/search/label/Free%
http://kinzieskreations.blogspot.com/search/label/Free%
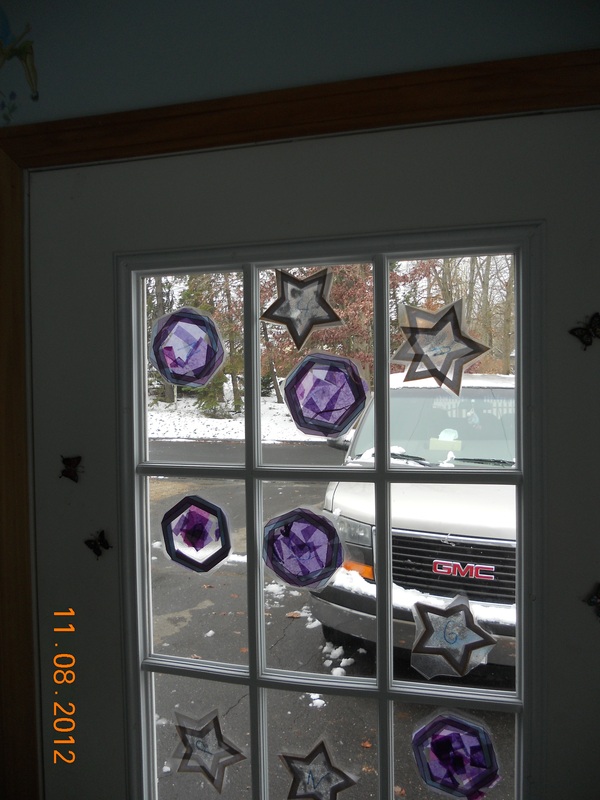
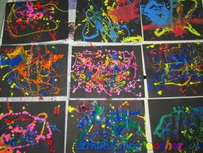
Stained Glass Art
I love these crafts. They are so super easy to do but look so pretty and the kids Love to make them, thats the best part. We make some each month that match our theme. The pics below are from Fall and our shapes for the month of November are star and hexagon. I print out a picture and cut out the inside. We are Free laminate I talked about. Lay down a piece os laminate the size of the picture, ot much bigger. lay your picture ontop and cut out some tissue squares. (I recycle all tissue paper from gifts at parties, does not have to be new.) Have kids place tissue squares inside of picture and cover with another piece of laminate. Tape to windows. It looks so pretty when the sun shines on the window. I use the color of the month for the tissue squares. Purple Hexagons and I actually used silver glitter in the stars. For the fall leaves we used all fall colors.

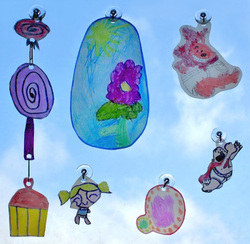
Plastic Cups Melted into Beuatiful Decorations
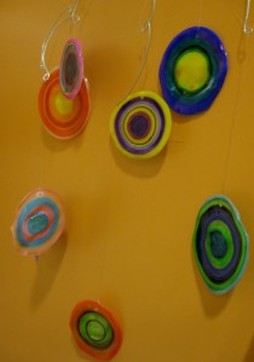
Kandinsky Mobile by Annie Rogers
Kandinsky-inspired mobile: paint clear plastic cups with sharpies then bake
Time Frame: 10-45 min
Skill Level: 1-5
Goals:
To learn about color terminology, including primary colors, secondary colors, warm colors, cool colors, and complementary colors.
To reference and learn about Kandinsky’s famous work of art.
To develop a color scheme for each concentric circle you create.
To re-purpose a material that can’t be recycled and that might otherwise be thrown out.
Materials:
8 oz clear soft plastic cups (can find “Great Value” brand at Walmart)
Color Wheel
24 set of Colored Sharpies
Scissors
Piece of Cardboard or brown paper bag
Toaster Oven or regular oven
Small hole punch
Monofilament
Optional: floral wire, pliers
Steps:
Talk about the color wheel. Identify primary and secondary colors, warm and cool colors, and complementary colors.
Choose a color scheme for one cup. Select the sharpies you will need and keep them to the side. Only use these to color your cup.
Turn the cup upside down and, using sharpies, begin coloring the cup. The bottom of the cup will be the center of your circle. Color your way down the sides of the cup, making bands of color of varying thicknesses. Try not to leave any uncolored spaces.
Using scissors, cut just the turned over rim of the cup.
Repeat steps 2-4 with 3 or 4 more cups, using different color schemes for each cup.
Turn your oven to 250° and let it preheat for a minute or so. Place two cups on a piece of cardboard or brown paper bag slide on top of a baking pan inside the oven. (if using a full-size oven, you may be able to cook all the cups at once, but 2 is the limit in my little toaster oven.)
Cook the cups for about 2 minutes, or until they have both melted down completely into a flat discs. Just out of the oven, they will still be a bit pliable, so if curling occurs, you usually have about 15 seconds to correct it using some sort of flattening tool (I usually just use a pair of scissors, closed) Repeat step 7 with your other discs. Allow your discs to cool completely (doesn’t take long.) Punch two holes in four of your disks (this step might be easier for the teacher to complete for the student, as punching a hole through plastic can be difficult.) Punch only one hole in the 5th disc. Cut a foot-long piece of monofilament and tie it through one of the holes in your first disc. Do this in each of the rest of your discs, including the one with only one hole. Tie the disks together by stringing attached monofilament of one into the bottom hole of another. When you are finished, you should have three or four discs hanging in one long row. Hang your mobile in a window to catch the light. Dazzle your friends with your knowledge of color!
http://www.aflnc.org/projects/?p=508
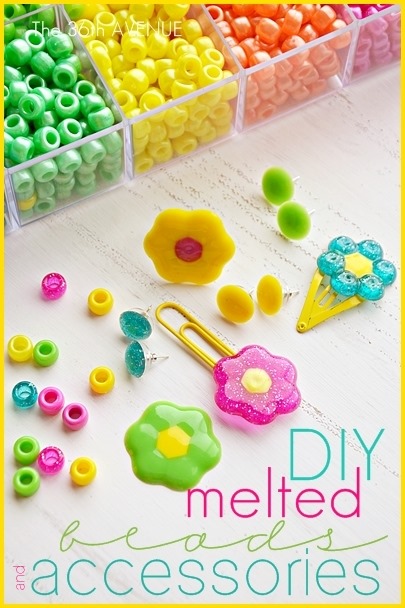
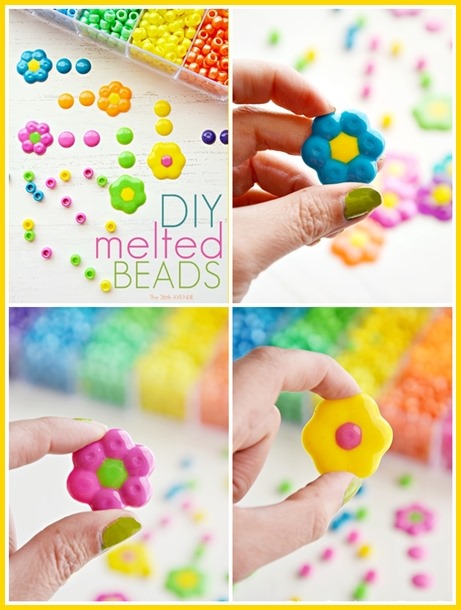
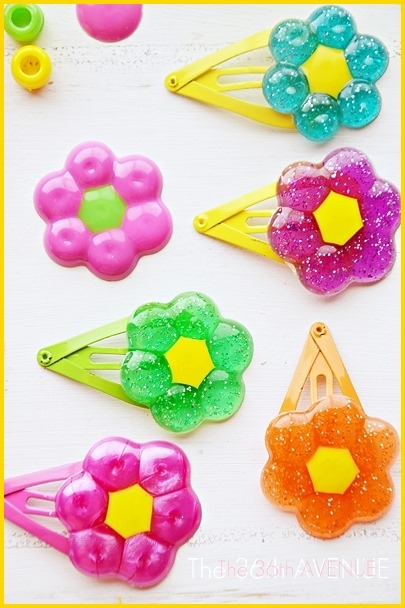
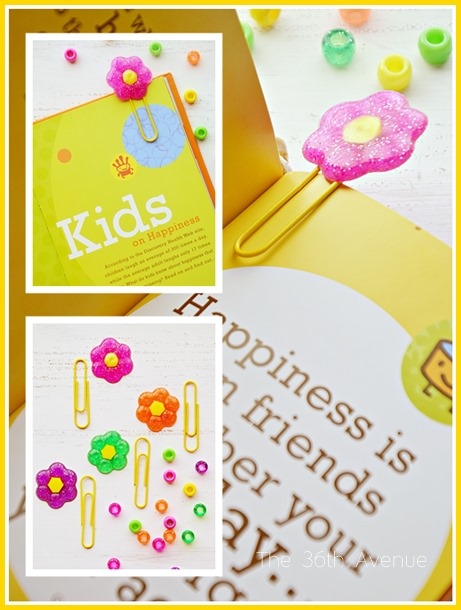
Melted Bead Crafts (by the36thavenue) see below
If you have never melted beads before let me tell you, this is a 15 minute project.
You can make a ton of jewelry, bookmarks, hair clips, and even magnets for under $5.
They are perfect for gifts!
Here is the Tutorial
The first thing you want to do is preheat your oven at 425 degrees F.
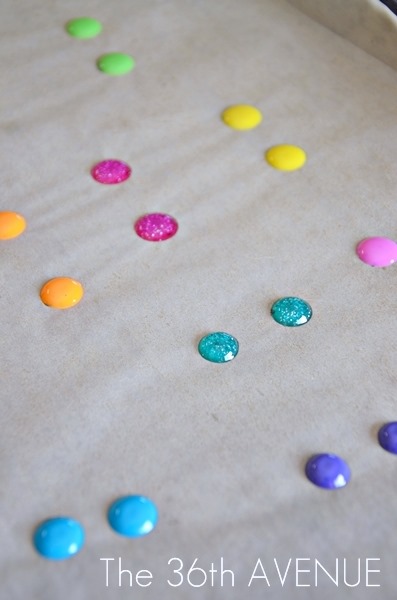
While the oven heats up place a baking parchment paper on top of a cookie sheet.
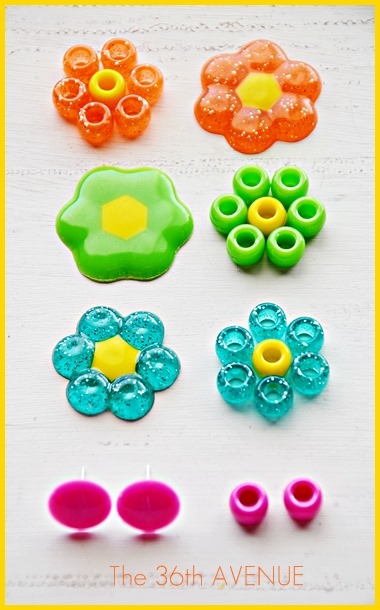
Make the shapes placing your beads to your like.
Have fun mixing colors and playing with different combinations.
You can see below what the beads look like before and after melting.
The flowers will take 10 minutes to melt. The earrings will take between 8 to 10 minutes.
I like to make them when the kids are at school or playing outside.
Important: Make sure you open the windows and doors.
My advise is to leave the room since the smell of the beads is very strong.
Don’t stay or keep the children in the kitchen
during the baking and cooling down process.
Go to the backyard to play!
Update: Some of my readers have shared that they have melted the beads in a toaster oven
and even in a gas grill outside and it worked.
So there you have two clever options to melt the beads out of the kitchen.
http://www.the36thavenue.com/2013/03/melted-beads.html
You can make a ton of jewelry, bookmarks, hair clips, and even magnets for under $5.
They are perfect for gifts!
Here is the Tutorial
The first thing you want to do is preheat your oven at 425 degrees F.
While the oven heats up place a baking parchment paper on top of a cookie sheet.
Make the shapes placing your beads to your like.
Have fun mixing colors and playing with different combinations.
You can see below what the beads look like before and after melting.
The flowers will take 10 minutes to melt. The earrings will take between 8 to 10 minutes.
I like to make them when the kids are at school or playing outside.
Important: Make sure you open the windows and doors.
My advise is to leave the room since the smell of the beads is very strong.
Don’t stay or keep the children in the kitchen
during the baking and cooling down process.
Go to the backyard to play!
Update: Some of my readers have shared that they have melted the beads in a toaster oven
and even in a gas grill outside and it worked.
So there you have two clever options to melt the beads out of the kitchen.
http://www.the36thavenue.com/2013/03/melted-beads.html
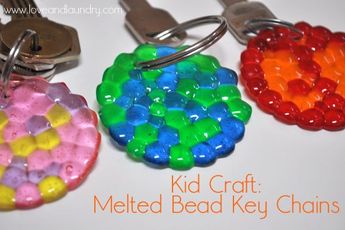
Melted Bead Key Chain. Great for Mothers Day or Fathers Day. See instructions below.
http://www.sugarbeecrafts.com/2013/06/melted-bead-keychains-kid-craft.html#_a5y_p=585046
http://www.sugarbeecrafts.com/2013/06/melted-bead-keychains-kid-craft.html#_a5y_p=585046
Zipper Pulls By NickJr
These are easy to make and great to wear. Visit Nick Jr to even more zipper pulls.
http://www.nickjr.com/home/search.jhtml?searchterm=zipper+pull+printables
Dora Zipper Pulls...Preschool Games Preschool Printables Preschool Crafts Custom Nick Jr. Printables Preschool Music...3-4 years > Dora Zipper Pulls Craft Finder Shows...years (280) Dora Zipper Pulls Dora Zipper Pulls...http://www.nickjr.com/crafts/dora-zipper-pulls.jhtml
Wubbzy Zipper Pulls...Preschool Games Preschool Printables Preschool Crafts Custom Nick Jr. Printables Preschool Music...3-4 years > Wubbzy Zipper Pulls Craft Finder Shows...years (280) Wubbzy Zipper Pulls Wubbzy Zipper Pulls...http://www.nickjr.com/crafts/wubbzy-zipper-pulls-cf.jhtml
Max & Ruby Zipper Pulls...Preschool Games Preschool Printables Preschool Crafts Custom Nick Jr. Printables Preschool Music...years > Max & Ruby Zipper Pulls Craft Finder Shows...280) Max & Ruby Zipper Pulls Max & Ruby Zipper...http://www.nickjr.com/crafts/max-ruby-zipper-pulls-cf.jhtml
Diego Arctic Rescue Zipper Pulls Preschool Games Preschool Printables Preschool Crafts Custom Nick Jr. Printables Preschool Music...Diego Arctic Rescue Zipper Pulls Craft Finder Shows...Diego Arctic Rescue Zipper Pulls Diego Arctic Rescue...http://www.nickjr.com/crafts/diego-arctic-zipper-pulls.jhtml
Milk Carton Art
Using a sharpie, color your shape. Easy as that. I use these for easter eggs every year, looks pretty hanging in the window.
http://alphamom.com/family-fun/crafts/milk-jug-decorative-window-crafts/
http://alphamom.com/family-fun/crafts/milk-jug-decorative-window-crafts/

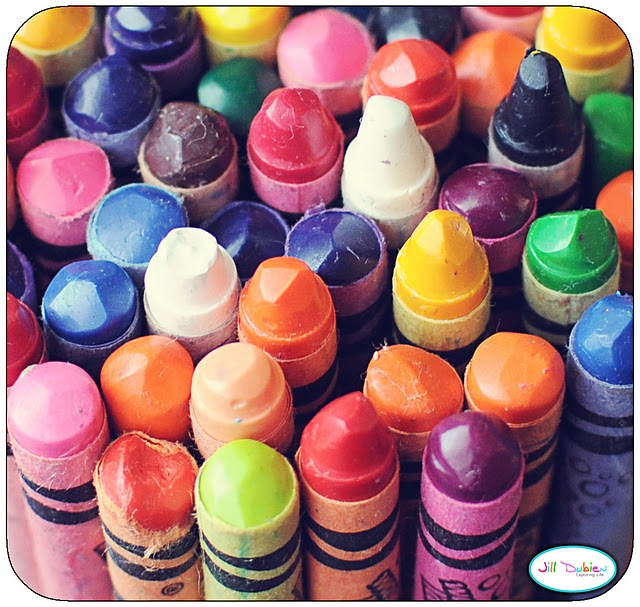
Crayon Maker
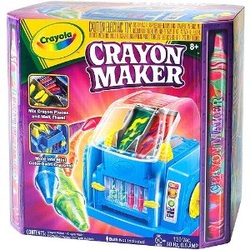
Crayons are always getting roken. Don't throw them away, thee are many thing you can use them for. You can recycle and make new ones or make some very pretty crafts. My kids love to make nw rainbow crayons and they can bring them home after. We also make beuatiful crafts.
Crayon Shaving Hearts
Crayon Shaving Hearts
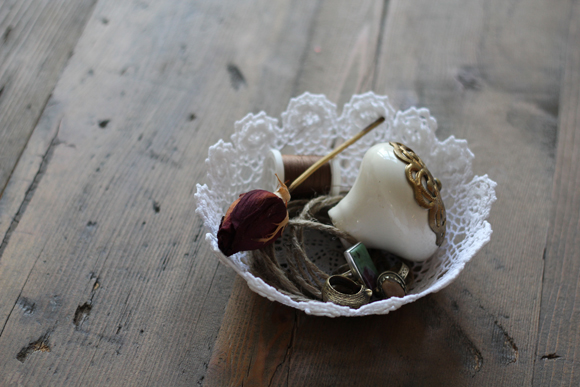
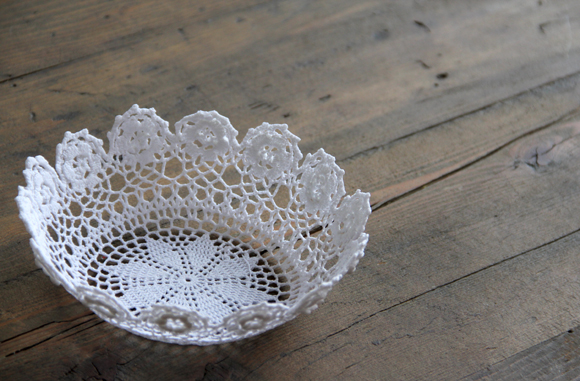
Lace Bowls~Mother's Day Gift Idea
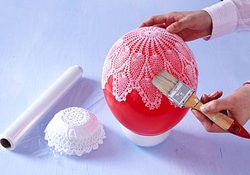
Mother's Day Craft
cover balloon with plastic wrap, place doily ontop of plastic wrap and then cover with mod podge, let dry. Pop balloon and you have a beautiful bowl.
Easy for kids to do.
http://pinterest.com/cinnamontr/creative-ideas/
cover balloon with plastic wrap, place doily ontop of plastic wrap and then cover with mod podge, let dry. Pop balloon and you have a beautiful bowl.
Easy for kids to do.
http://pinterest.com/cinnamontr/creative-ideas/
Lace Doily Bowl (by DIY)~Mother's Day Gift Idea
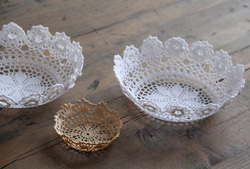
I found this lace bowl to be easier than the balloon one. I made this one with my 2,3,4 & 5 year olds in less than 5 mins and it made a beautiful Christmas gift. You can also make one for Mother's Day or for Grandma too.
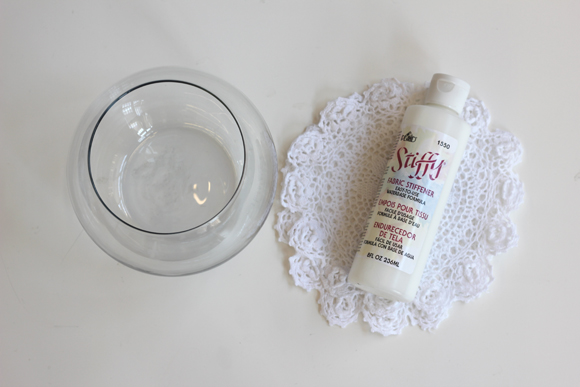
What you need: doilies
fabric stiffener and a bowl.
Choose a bowl that will allow you to drape the doily over the bottom of to create a bowl shape.
plastic wrap. ( I used this oer the bowl to make sure the lace would not stick to it.
If you have a bowl and doilies already and don’t want to purchase fabric stiffener, you can make your own! Just mix equal parts white glue and water.
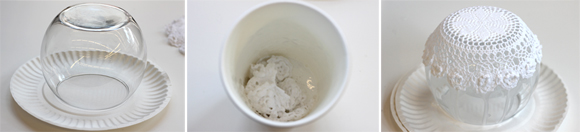
This DIY is as easy as 1,2,3: Turn your bowl upside down, soak the doily in fabric stiffener, and drape the doily on the bottom of the bowl.
Use your fingers to smooth the doily over the bowl, removing any wrinkles and pushing out excess fabric stiffener. Leave it on the bowl overnight to allow it to dry and harden.
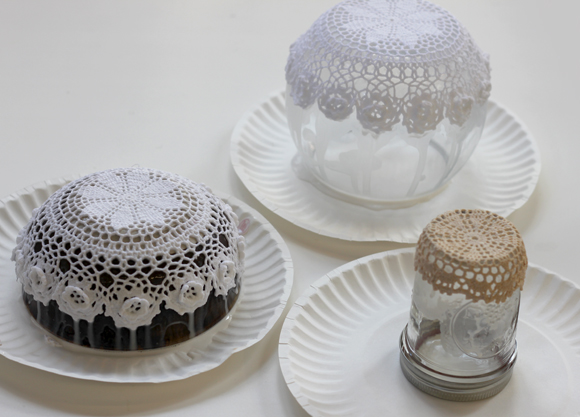
Experiment with different shapes and sizes! In the morning, your lace bowls will be ready for use.
http://blog.freepeople.com/2012/09/diy-lace-doily-bowl/
What you need: doilies
fabric stiffener and a bowl.
Choose a bowl that will allow you to drape the doily over the bottom of to create a bowl shape.
plastic wrap. ( I used this oer the bowl to make sure the lace would not stick to it.
If you have a bowl and doilies already and don’t want to purchase fabric stiffener, you can make your own! Just mix equal parts white glue and water.
This DIY is as easy as 1,2,3: Turn your bowl upside down, soak the doily in fabric stiffener, and drape the doily on the bottom of the bowl.
Use your fingers to smooth the doily over the bowl, removing any wrinkles and pushing out excess fabric stiffener. Leave it on the bowl overnight to allow it to dry and harden.
Experiment with different shapes and sizes! In the morning, your lace bowls will be ready for use.
http://blog.freepeople.com/2012/09/diy-lace-doily-bowl/

Gift idea for Mothers Day or Christmas or even Grandparents Day
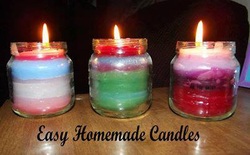
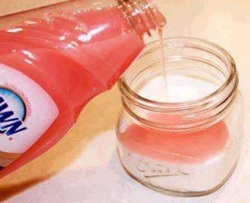
~*~Easy Homemade Candles~*~
Materials:
Baby food Jar...
Used Scentsy wax (melted)
Plain birthday candles
When you are ready to trade out your used wax pour it in a baby food jar, when you pour in your first used batch stand a plain birthday candle up in the middle of it. Each time you trade out your wax add it to your jar until full.
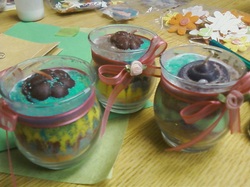
Made these for Mother's Day Gifts. The children started sand art, then added the candle 1/2 way through and then continued the sand art. I then sealed it with water down glue on top.
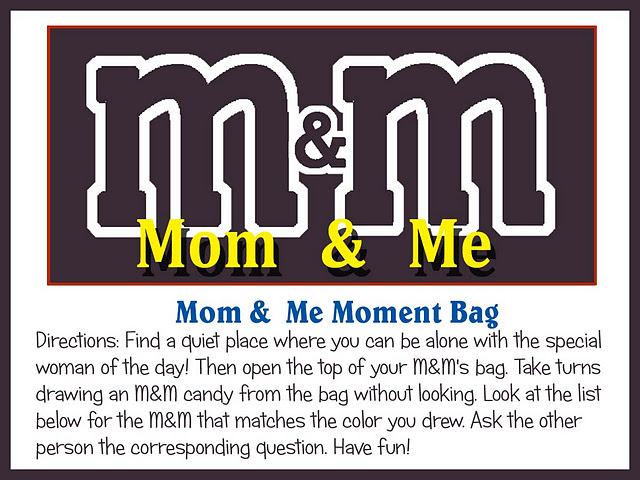
M & M's For Mom
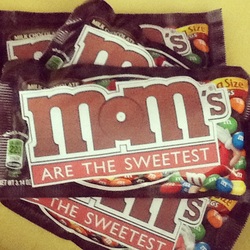
This is a cute Mother's Day gift.
the cutest Mother’s Day present ever! This awesome idea is from Sofia’s Primary Ideas. It was a lunch bag that had a tag like this one: Just place the items in a paper lunch bag for Mom.
For Mother's Day this year I am gathering materials for a "Mother's Day Date Night Kit". I will have all the items ready for the children to put into their bag and take home.
The kit will include:
- A DO NOT disturb sign to hang on the door
- Bag of Popcorn
- M & M's
- Activity Description Sheet
- Fill in the blank on nice card stock You are one special lady because ________________!
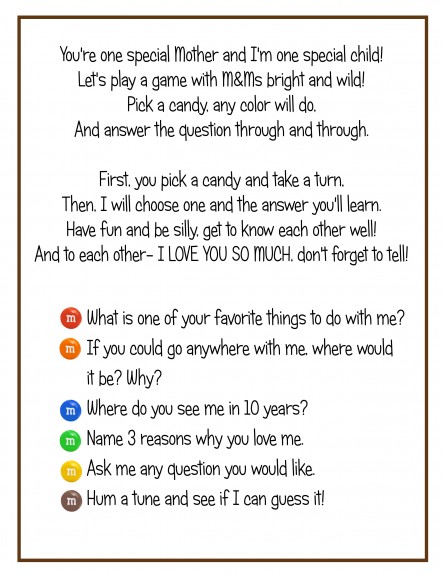
The Activity Description Sheet says:
You're one special lady and I'm one special child!
Let's play a game with M&M's bright and wild!
Pick a candy, any color will do.
And answer the question through and through!
Then once you're done, toss in the air.
Can the other one catch? Or will it land in her hair?
Have fun and be silly - get to know each other well!
And to each other - I LOVE YOU SO MUCH, don't forget to tell!
Red- What is one of your favorite things to do with me?
Orange- Where would you want to go anywhere in the world with me and why?
Yellow- What do you see us doing together in 10 years?
Green- Name 3 reasons why you love me.
Blue- Ask me any question you like!
Brown- Hum a tune and see if I can guess it!
You can download the files here from kinziekreations:
M&M SheetM&M Instruction & Question Sheet
M&M Bag TagM&M Bag Tag
Download M&M MOM printable
http://kinzieskreations.blogspot.com/2012/05/m-for-mom.html
the cutest Mother’s Day present ever! This awesome idea is from Sofia’s Primary Ideas. It was a lunch bag that had a tag like this one: Just place the items in a paper lunch bag for Mom.
For Mother's Day this year I am gathering materials for a "Mother's Day Date Night Kit". I will have all the items ready for the children to put into their bag and take home.
The kit will include:
- A DO NOT disturb sign to hang on the door
- Bag of Popcorn
- M & M's
- Activity Description Sheet
- Fill in the blank on nice card stock You are one special lady because ________________!
The Activity Description Sheet says:
You're one special lady and I'm one special child!
Let's play a game with M&M's bright and wild!
Pick a candy, any color will do.
And answer the question through and through!
Then once you're done, toss in the air.
Can the other one catch? Or will it land in her hair?
Have fun and be silly - get to know each other well!
And to each other - I LOVE YOU SO MUCH, don't forget to tell!
Red- What is one of your favorite things to do with me?
Orange- Where would you want to go anywhere in the world with me and why?
Yellow- What do you see us doing together in 10 years?
Green- Name 3 reasons why you love me.
Blue- Ask me any question you like!
Brown- Hum a tune and see if I can guess it!
You can download the files here from kinziekreations:
M&M SheetM&M Instruction & Question Sheet
M&M Bag TagM&M Bag Tag
Download M&M MOM printable
http://kinzieskreations.blogspot.com/2012/05/m-for-mom.html
Mother's Day Sugar Hand Scrub
Sugar Hand scrub - kind of like Mary Kay's Satin Hands...only cheaper!
GREAT GIFT IDEA! - make, put in mason jar, tie with bow, add a tag!
Cheap and easy!
Fill mason jar 3/4 of the way full with sugar....
Then add dawn dish soap (I use the pink one that has the olay in it, smells good and moisturizes) until it reaches just below the mouth of the jar.
Stir the sugar and soap together until it is paste like. If it seems to be too runny, add a little sugar at a time until its a paste-like consistency. You don’t want it to be too runny!
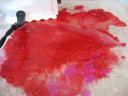
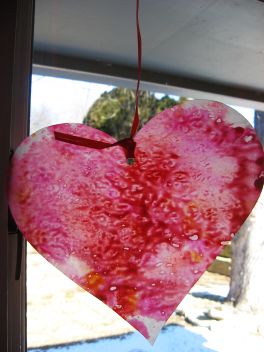
Crayon shavings Art (by spitomylou.org)
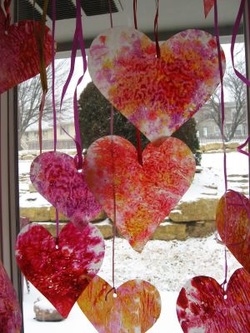
Crayon shavings melted between wax paper and then cut into hearts make a beautiful display in windows. This is an oldie but goodie craft that we love. Here are ours made with lots of kid help! I can’t think of anything more cheerful or happy hanging from a window.
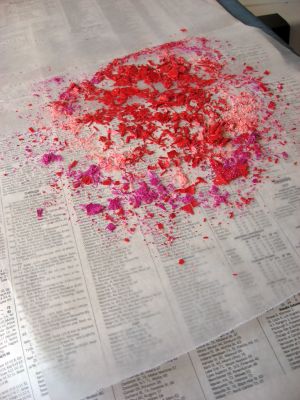
We made lots of crayon shavings with a pencil sharpener.
Place shavings on a piece of wax paper.
Either place another piece of wax paper on top or fold over the edge to cover all of the shavings.
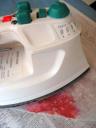
Iron on the lowest setting for about 1 second. You can go always go longer after checking to see if the shavings have melted. Be careful to not burn the wax paper. It is a good idea to do the ironing on a piece of newspaper. Some shavings could leak out of the sides and it does leave a residue underneath the wax paper. If you are worried about your iron, just place your wax paper between two sheets of newspaper or scrap paper.
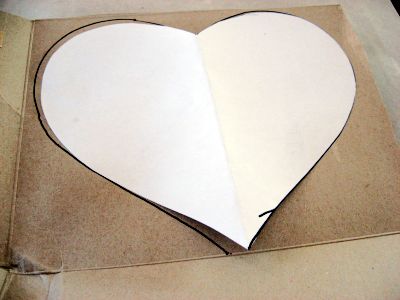
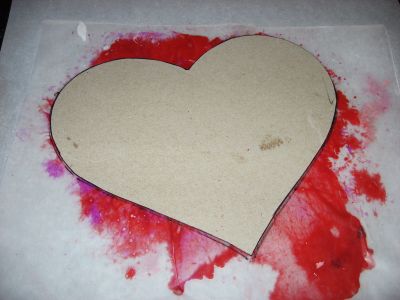
I think it is easiest for kids to trace around cardboard so I took cereal boxes and cut out heart shapes to be used for patterns. This is where you get variety so let the kids draw the hearts.
Draw around your pattern.
Cut out, hole punch and tie on ribbon, thread or fishing line. Hang!
http://www.skiptomylou.org/2007/02/02/crayon-shaving-hearts/
We made lots of crayon shavings with a pencil sharpener.
Place shavings on a piece of wax paper.
Either place another piece of wax paper on top or fold over the edge to cover all of the shavings.
Iron on the lowest setting for about 1 second. You can go always go longer after checking to see if the shavings have melted. Be careful to not burn the wax paper. It is a good idea to do the ironing on a piece of newspaper. Some shavings could leak out of the sides and it does leave a residue underneath the wax paper. If you are worried about your iron, just place your wax paper between two sheets of newspaper or scrap paper.
I think it is easiest for kids to trace around cardboard so I took cereal boxes and cut out heart shapes to be used for patterns. This is where you get variety so let the kids draw the hearts.
Draw around your pattern.
Cut out, hole punch and tie on ribbon, thread or fishing line. Hang!
http://www.skiptomylou.org/2007/02/02/crayon-shaving-hearts/

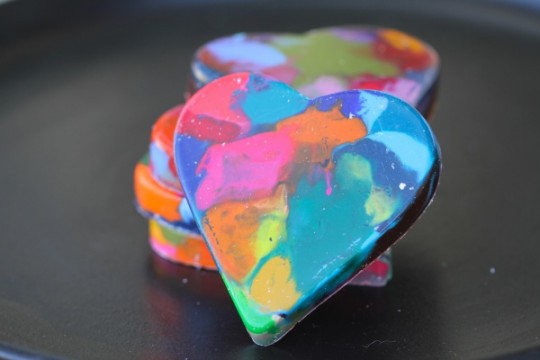
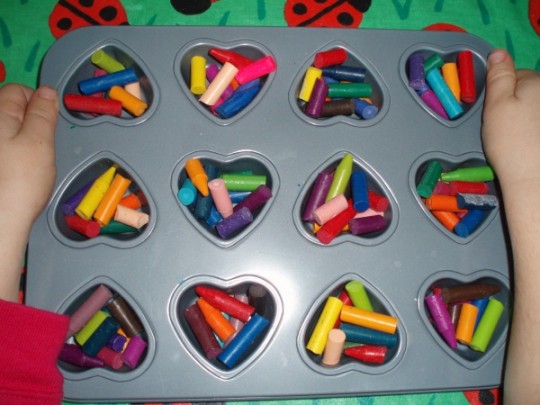
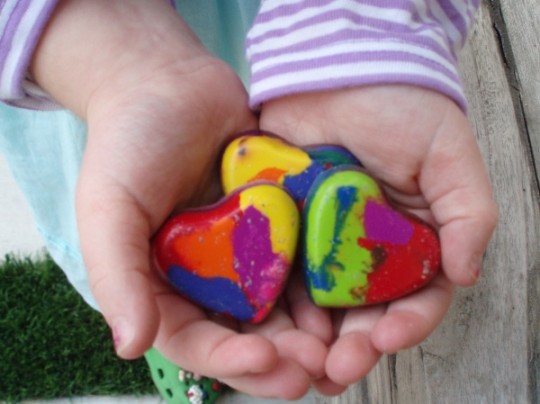
You Melt My Heart Crayons (by cookingwithmykid.com)
Homemade Valentine Week: pics below
You Melt My Heart Crayons
Prep Time: 5 minutes
Hands on Time: 30 minutes
Supplies:crayons, small muffin tin (we used a heart shaped one)
Preheat the oven to 250 degrees.
Gather up any crayon pieces you can find (new crayons work, too) and peel off the paper wrappers. If you are using a high quality crayon, like Crayola, put the crayons in a bowl of warm water and within minutes the paper peels will loosen themselves from the crayon. We found cheaper crayons don’t have the same effect in the warm water and can often start melting in the bowl, in your hands…a big mess. Peel those papers off by hand. Break larger crayons into small pieces and fill each mold with crayon pieces. We used a mini heart mold tin but any size or shape tin will work. Put a sheet pan under the crayon filled tin to catch any stray drips. Bake until the crayons melt, about 10-15 minutes. Let them cool completely before removing from the molds. If there are any rough edges, rub the crayons on a piece of paper to smooth out them out.
http://www.cookingwithmykid.com/uncategorized/homemade-valentine-week-you-melt-my-heart-crayons/
Do-A-Dot Insects (by giftofcuriousity)
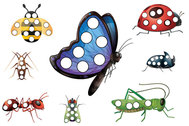
http://www.giftofcuriosity.com/printables/download-insect-do-a-dot-printables/
Download your copy of the
Insects Do-A-Dot Printables by clicking here!
Download your copy of the
Insects Do-A-Dot Printables by clicking here!
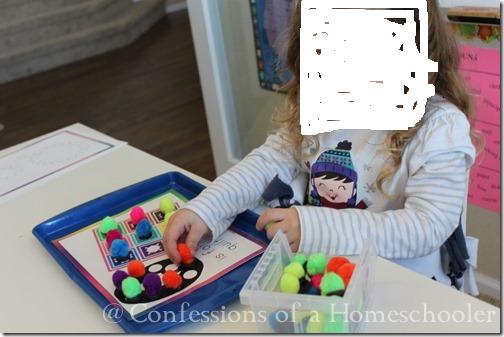
Rainbow Do-A-Dot (by giftofcuriousity)
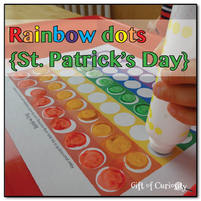
The Rainbow Dots activity sheet is designed to help young children learn colors and practice one-to-one correspondence. It can be used as part of a St. Patrick’s theme or during any time of the year at all! I recommend using the Rainbow Dots activity sheet with either Do-A-Dot Rainbow Art Paints or pom poms.
http://www.giftofcuriosity.com/rainbow-dots-st-patricks-day/
http://www.giftofcuriosity.com/downloads/Rainbow_Dots.pdf
http://www.giftofcuriosity.com/rainbow-dots-st-patricks-day/
http://www.giftofcuriosity.com/downloads/Rainbow_Dots.pdf
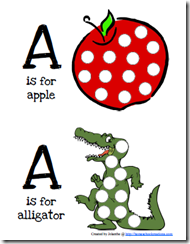
Do-A-Dot Alphabet Printables (by homeschoolcreations.com)
A-M
http://homeschoolcreations.com/files/ABC_Do_a_Dots_A-M.pdf
N-Z
http://homeschoolcreations.com/files/ABC_Do_a_Dots_N_-_Z.pdf
http://homeschoolcreations.com/files/ABC_Do_a_Dots_A-M.pdf
N-Z
http://homeschoolcreations.com/files/ABC_Do_a_Dots_N_-_Z.pdf
Do A Dot Alphabet Letters Only-no pictures (by totschool.shannons.org)

http://totschool.shannons.org/?page_id=2360
Do A Dots are so much fun. The children can't get enough of them. You can google search Do A Dot printables and you will find so much more.
More at the following site. A-Z
http://www.confessionsofahomeschooler.com/preschool-printables
http://shared.confessionsofahomeschooler.com/lotw/A_ZDoADots.pdf
Do A Dots are so much fun. The children can't get enough of them. You can google search Do A Dot printables and you will find so much more.
More at the following site. A-Z
http://www.confessionsofahomeschooler.com/preschool-printables
http://shared.confessionsofahomeschooler.com/lotw/A_ZDoADots.pdf
1-20 Do-A-Dot Worksheets (by shared.confessionsofahomeschooler.com)
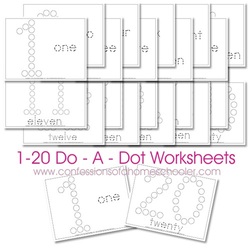
Printables-1-20 Do-A-Dot Worksheetshttp://shared.confessionsofahomeschooler.com/math/1_20_Doadots.pdf
–> Download the FREE 1-20 Do-a-Dot Worksheets <–
–> Download the FREE 1-20 Do-a-Dot Worksheets <–
Letter & Number Tracers (by printactivities.com)
http://www.printactivities.com/Tracing.html Tracing Preschool Printables & Worksheets, Name Tracers
Letter Tracers, Number Tracers, Animal Tracers, Happy Fathers Day Tracers, Happy Mothers Day, etc
Letter Tracing Printables
Letter A Worksheet
Letter B Worksheet
Letter C Worksheet
Letter D Worksheet
Letter E Worksheet
Letter F Worksheet
Letter G Worksheet
Letter H Worksheet
Letter I Worksheet
Letter J Worksheet
Letter K Worksheet
Letter L Worksheet
Letter M Worksheet
Letter N Worksheet
Letter O Worksheet
Letter P Worksheet
Letter Q Worksheet
Letter R Worksheet
Letter S Worksheet
Letter T Worksheet
Letter U Worksheet
Letter V Worksheet
Letter W Worksheet
Letter X Worksheet
Letter Y Worksheet
Letter Z Worksheet
Number Tracing Printables
Number 1 Worksheet
Number 2 Worksheet
Number 3 Worksheet
Number 4 Worksheet
Number 5 Worksheet
Number 6 Worksheet
Number 7 Worksheet
Number 8 Worksheet
Number 9 Worksheet
Number 10 Worksheet
Tulip Bingo Dauber Art Printables (By dltk-kids)
Visit dltk-kids for tons of Bingo Dauber (Do-A-Dot Art).
http://www.dltk-kids.com/type/bingo_daubers.htm
You will find Animals, Holidays, Seasons:, and other things as well.
Also see the following site for more Do-A-Dots
http://www.confessionsofahomeschooler.com/preschool-printables
http://www.dltk-kids.com/type/bingo_daubers.htm
You will find Animals, Holidays, Seasons:, and other things as well.
Also see the following site for more Do-A-Dots
http://www.confessionsofahomeschooler.com/preschool-printables
A-Z Dot-A-Dot

More pictures like at the link below. All letters A-Z. To get all the letters visit Confessions of a Home Schooler.
Letter A Pattern Activity:
http://www.confessionsofahomeschooler.com/preschool-printables
Letter A Pattern Activity:
http://www.confessionsofahomeschooler.com/preschool-printables
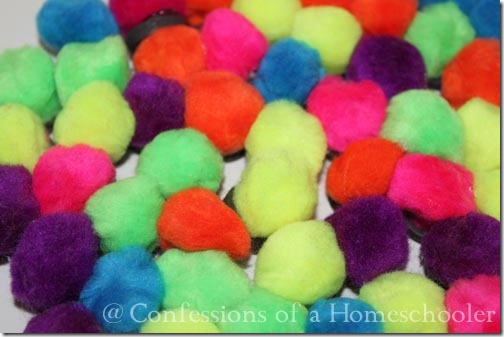
Pom Pom Magnets
Making your own manipulatives is easy and fun! To make the homemade pom-pom magnets you’ll need the following items:
Hot glue gun and glue sticks
1 package of medium sized pom-poms
1 package of magnetic buttons
Directions:
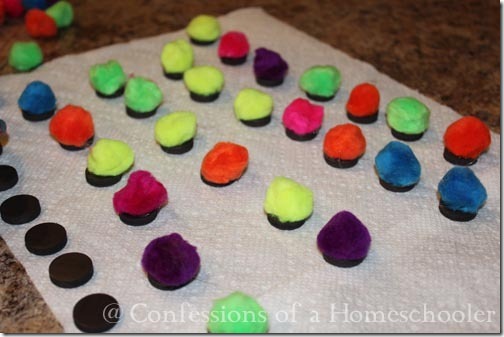
Cover your working surface with a paper towel, or another disposable cloth to protect your counters.
Place a dab of hot glue on each magnet button, then immediately press a pom-pom onto the hot glue.
http://www.confessionsofahomeschooler.com/blog/2012/09/homemade-pom-pom-magnets-2.html
Hot glue gun and glue sticks
1 package of medium sized pom-poms
1 package of magnetic buttons
Directions:
Cover your working surface with a paper towel, or another disposable cloth to protect your counters.
Place a dab of hot glue on each magnet button, then immediately press a pom-pom onto the hot glue.
http://www.confessionsofahomeschooler.com/blog/2012/09/homemade-pom-pom-magnets-2.html

Magic Nuudle Fun (by makinglearningfun.com)
Free Printables:
http://makinglearningfun.com/themepages/MagicNuudlePages.htm
Just Color and add magic nuudles.
By the Letter
A is for Apple
C is for Cattails
Little Bo Peep
P is for Penguin
W is for Wishy Washy-Mrs.
W is for Wishy Washy-Mr.
By the Number
2 is for 2 Things
http://makinglearningfun.com/themepages/MagicNuudlePages.htm
Just Color and add magic nuudles.
By the Letter
A is for Apple
C is for Cattails
Little Bo Peep
P is for Penguin
W is for Wishy Washy-Mrs.
W is for Wishy Washy-Mr.
By the Number
2 is for 2 Things
Shape Tracers
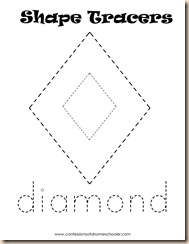
Print the shapes for Preschoolers to trace.
Shape Tracers: You can use this a few different ways! This download includes 10 shape tracing cards.
http://shared.confessionsofahomeschooler.com/math/shapetracers.pdf
Shape Tracers: You can use this a few different ways! This download includes 10 shape tracing cards.
http://shared.confessionsofahomeschooler.com/math/shapetracers.pdf
Number Printables (by preschoolplaybook.com)
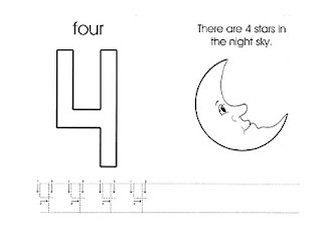
Just click on the link below to get all the pages 0-10.
http://www.preschoolplaybook.com/p/number-pages.html
Numbers 0 and 1
Number 2
Number 3
Numbers 4 and 5
Numbers 6, 7, and 8
Number s 9 and 10
http://www.preschoolplaybook.com/p/number-pages.html
Numbers 0 and 1
Number 2
Number 3
Numbers 4 and 5
Numbers 6, 7, and 8
Number s 9 and 10
Oil Construction Paper Sun Catcher (www.education.com)
Want to add a little sparkle to your home? Make an eye catching sun catcher with your child that not only brightens any window but also builds his fine motor skills and creativity. Instead of using traditional paint or crayons, he'll experiment with baby oil and a cotton swab. This is a great science and art experiment that's sure to make any winter afternoon a little sunnier.
What You Need:
Construction paper in various colors
Medium bowl
Marker
Scissors
Baby oil
Water
Small plastic container
Cotton swabs
What You Do:
Get started by having your child use a marker to trace around the medium bowl on a sheet of construction paper to create a circle. Have him cut out the circle (boost those fine motor skills!).
Before constructing the sun catcher, let him experiment making lines and designs on a sheet of white paper with crayons. Trade the paper and crayons for the construction paper circle. Explain to him that he won't be drawing with crayons—he'll use a cotton swab instead!
Pour a small amount of baby oil into the plastic container. Have him dip the cotton swab in the baby oil and draw lots of lines and scribbles on the construction paper circle. What does he think the baby oil will do to the paper?
Watch as the oil changes the construction paper! Did it change in the way he thought it would? For comparison, ask him to dip a cotton swab in water and see if it changes the construction paper the same way the baby oil did. Why does he think the baby oil makes interesting lines and water doesn't?
Encourage him to continue drawing designs on the sun catcher with the cotton swab.
When he's done painting, hang the finished sun catcher in a window and watch at it glows in the sunlight.
http://www.education.com/activity/article/oil-sun-catcher/
3D School Bus (by dltk-kids)

Free Printable at http://www.dltk-kids.com/school/3d-bus.htm
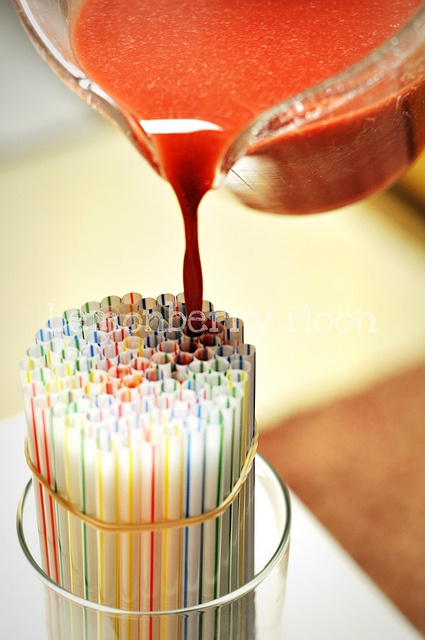
Eewwwwww Worms! (by instructables.com)
Gotta try this...What happens when you put jello in straws? Worms! kids will love this :) Who knew???
From instructables.com
Just try to mix the right colors of jello. They look so real. I don't know if my kids will eat them. They love jello though.
From instructables.com
Just try to mix the right colors of jello. They look so real. I don't know if my kids will eat them. They love jello though.

Sink or Float
Use with any theme. Find some items pertaining to you theme and place them in water one at a time asking before each child if they think it will sink or float.
Amazing Magnets
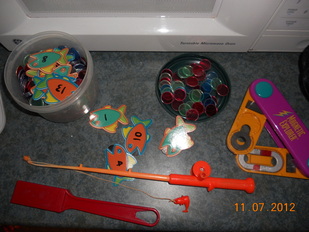
We play with magnets all the time. I have some bingo magnets and a fishing pole. Sometimes we will gather items to see if they are magnetic. the kids just love playing with the bingo wand.
Banana Split Craft.
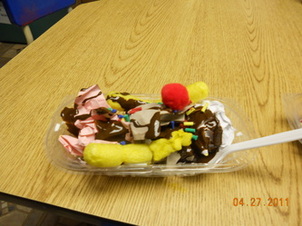
This is something I came up with for our Food Theme.
Instructions for Banana Split Craft.
This is so easy. I received some banana split bowls donated from our local ice cream shop. Each ice cream flavor is a sheet of colored paper that the kids just crumpled up. The bananas are magic nuudles stuck together. The cherry is a red pom pom. The fudge is brown paint and we added foam sprinkles on top and added a plastic spoon.
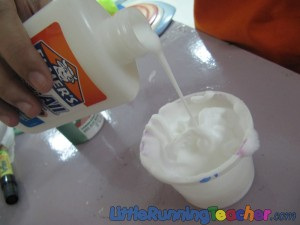
Puffy Ice Cream (By littlerunningteacher)
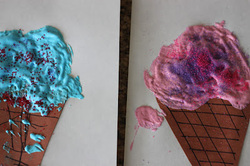
What Little Running Teacher did was to set up everything in front of me and told the kids that we were going to have an ice cream party! I then put shaving cream and glue into all the cups. After which I told the kids to pick their flavor! Pink was strawberry, Red was apple, Blue was Blueberry, Green was Pistachio, Violet was Ube and Yellow was Mango. As I called them, they each told me their flavor and I dripped a few drops of paint unto the cup and handed it to them (along with the popsicle stick). They mixed and mixed and mixed! Until finally, it was time to scoop it up with their hands and put the ice creams on the cones!
What you will need
Shaving Cream
Glue
Hard paper (Oslo paper/Easel board paper)
Small cup
Popsicle stick
Brown Paper or Brown Crayon
Paint of various colors
White paint
Step 1: Before starting anything, make sure the paint is ready. Mix a little white to make the color a little bit more “creamy”. Also prepare some paper cones for the kids. If you do not have any brown paper, you can let the kids just draw/color the cones themselves. We opted to just stick the cone to the paper ourselves for the toddlers.
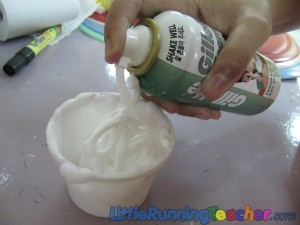
Step 2: Show the children the materials. They really enjoy seeing the shaving cream being sprayed! It’s a new experience for them. For those kids who can, it would be better to let them press it themselves.
Step 3: Pour the glue. There isn’t really an exact amount as to how much you should put. I put almost the same amount of glue and shaving cream.
Step 4: Let the kids pick a color/flavor! Drop some “flavor” into the cup
Step 5: Let the kids mix away!
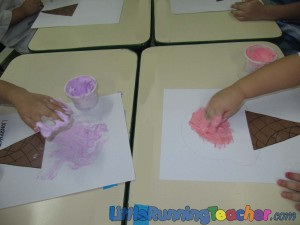
Step 6: Let them use their hands and spread the cream unto the paper. It’s really tons of fun to see their reaction from the unique texture
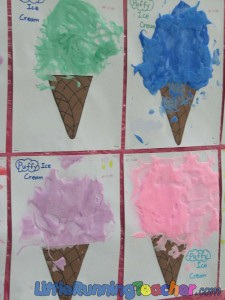
Step 7: It takes around 2-3 days to properly dry so though it’s tempting to poke (‘coz it’s really really soft and smooth), try to control yourself from poking it until it completely dries and hardens up a bit.
http://www.littlerunningteacher.com/puffy-ice-cream/
What you will need
Shaving Cream
Glue
Hard paper (Oslo paper/Easel board paper)
Small cup
Popsicle stick
Brown Paper or Brown Crayon
Paint of various colors
White paint
Step 1: Before starting anything, make sure the paint is ready. Mix a little white to make the color a little bit more “creamy”. Also prepare some paper cones for the kids. If you do not have any brown paper, you can let the kids just draw/color the cones themselves. We opted to just stick the cone to the paper ourselves for the toddlers.
Step 2: Show the children the materials. They really enjoy seeing the shaving cream being sprayed! It’s a new experience for them. For those kids who can, it would be better to let them press it themselves.
Step 3: Pour the glue. There isn’t really an exact amount as to how much you should put. I put almost the same amount of glue and shaving cream.
Step 4: Let the kids pick a color/flavor! Drop some “flavor” into the cup
Step 5: Let the kids mix away!
Step 6: Let them use their hands and spread the cream unto the paper. It’s really tons of fun to see their reaction from the unique texture
Step 7: It takes around 2-3 days to properly dry so though it’s tempting to poke (‘coz it’s really really soft and smooth), try to control yourself from poking it until it completely dries and hardens up a bit.
http://www.littlerunningteacher.com/puffy-ice-cream/

Water Gun Paintings ( By little running teacher)
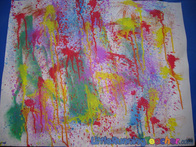
This is a great outdoor summer activity. Make sure you set it up somewhere that won't matter if it get paint on it. We use washable paints. Hang the papers and use water guns with different color paints in them. Aim & Spray away. Have each child make their own and then have them all make a big one to hang in your classroom.
I bought a blue gun for blue paint, yellow gun for yellow, etc.
http://www.littlerunningteacher.com/big-art-with-water-pistols-and-spray-bottles/
I bought a blue gun for blue paint, yellow gun for yellow, etc.
http://www.littlerunningteacher.com/big-art-with-water-pistols-and-spray-bottles/
Squeeze Painting ( By little running teacher)
This is great small motor skills for the kids and so much fun to do and they love how it looks when they are done.
What you will need
Paint
Funnel
Small/Long plastics
Paper (We chose to use black paper for a different effect)
Scissors
Step 1: Pour some paint into the plastic using a funnel. Try not to put too much water into the mixture, else it would just pour out later on.
Step 2: Once you are ready to begin, cut a really small hole at the tip of the plastic and let the kids squeeze out all the paint they can! Don’t put too much paint because the kids seriously won’t stop squeezing until all the paint drips out!
http://www.littlerunningteacher.com/squeeze-painting/
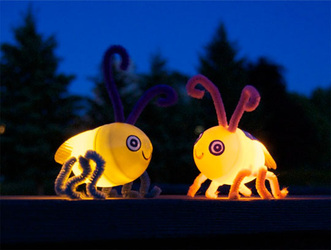
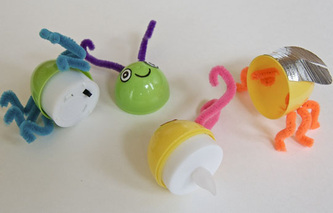
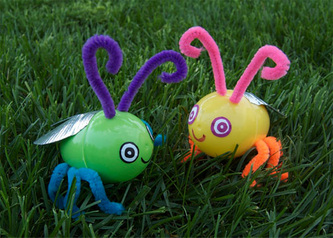
The children made the most adorable fireflies that really light up. Link below with instructions.
Another cute craft we are making is the Very Hairy/Fuzzy Caterpillar. We use grass seeds and watch him grow, you can also use chia seeds.
http://familyfun.go.com/crafts/very-hairy-caterpillar-847654/
http://spoonful.com/crafts/very-hairy-caterpillar
http://spoonful.com/crafts/very-hairy-caterpillar
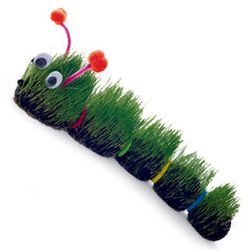

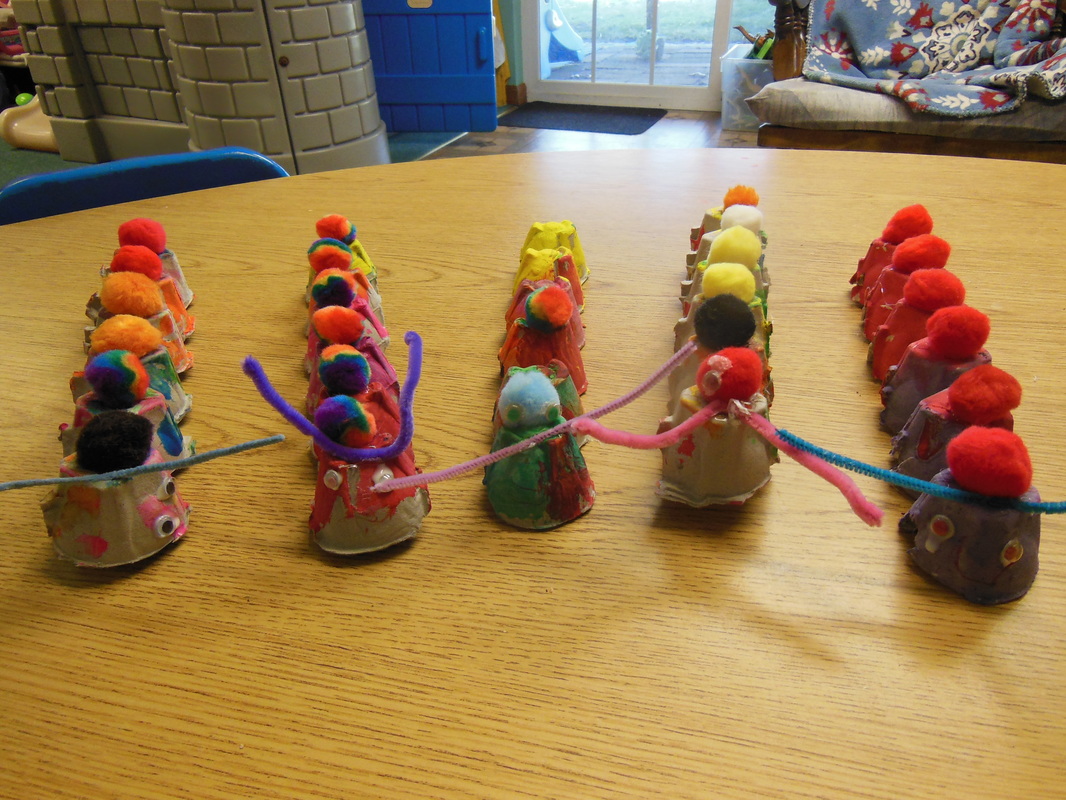

Picture 1 is a caterpillar made from an egg carton, the kids painted it then added pompoms and a pipe cleaner for an antenna and added wiggley eyes
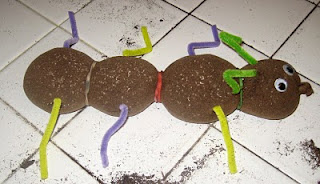
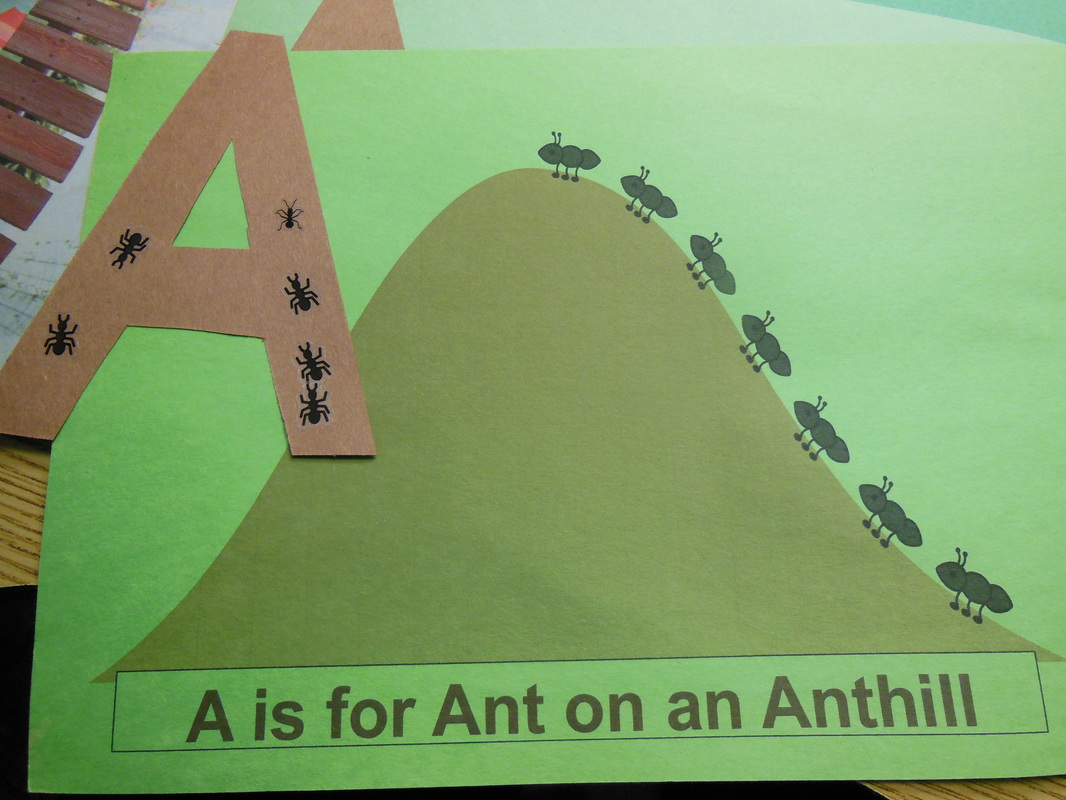
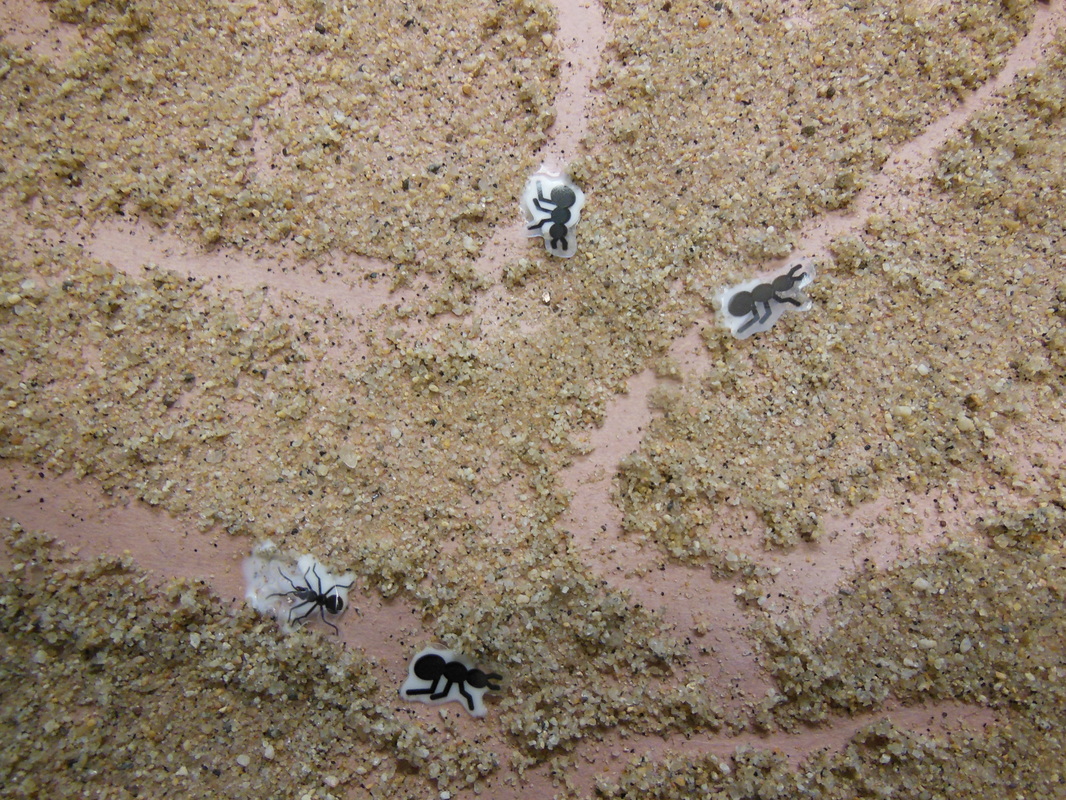
Picture 2 is clipart from http://sweetclipart.com/index.php?q=ants-crawling-ant-hill-931, I printed on green aper then the kids added ant stickers
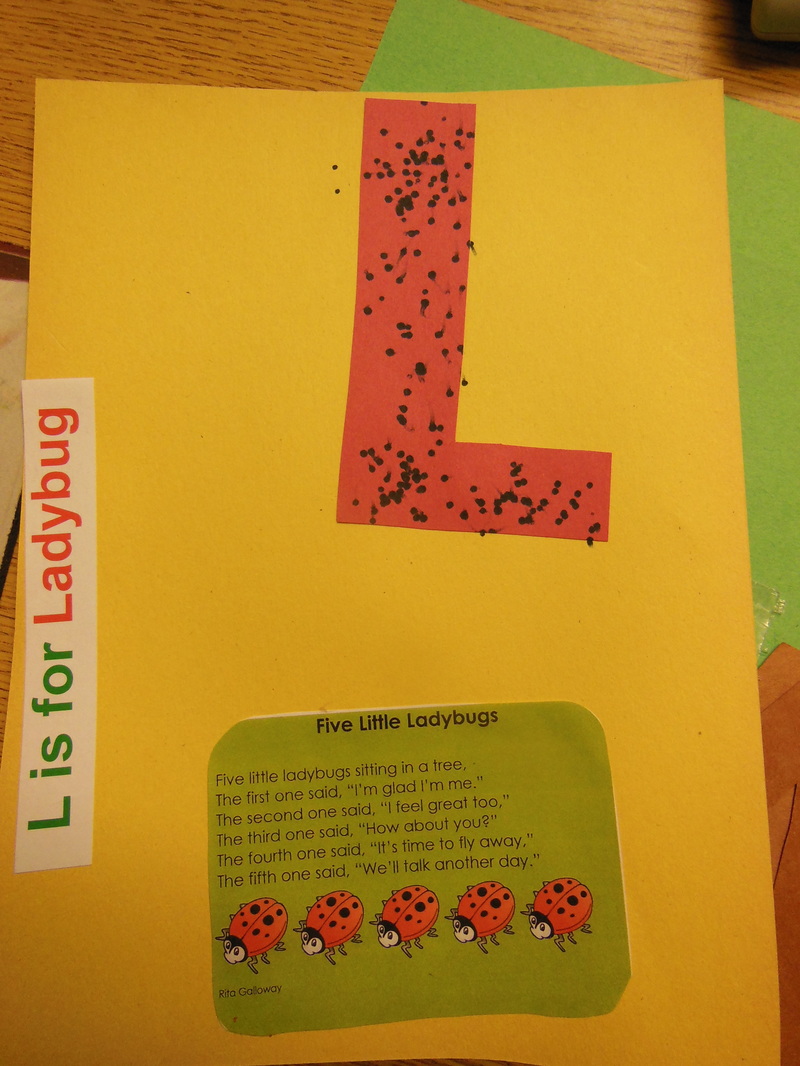
Picture 3 is L is for Ladybug. I got the song printable from http://www.2care2teach4kids.com/preschool/learningcenters/LearningKids/page6.htm
Picture 4 & 5 is an Ant Trail. the kids painted the paper with watered down glue then sprinkled sand on it, have child use their finger to make trials, let it dry then added an stickers, I usually add plastic ants but I couldn't find any anywhere this time.
Picture 2 is clipart from http://sweetclipart.com/index.php?q=ants-crawling-ant-hill-931, I printed on green aper then the kids added ant stickers
Picture 3 is L is for Ladybug. I got the song printable from http://www.2care2teach4kids.com/preschool/learningcenters/LearningKids/page6.htm
Picture 4 & 5 is an Ant Trail. the kids painted the paper with watered down glue then sprinkled sand on it, have child use their finger to make trials, let it dry then added an stickers, I usually add plastic ants but I couldn't find any anywhere this time.
Egg Shakers
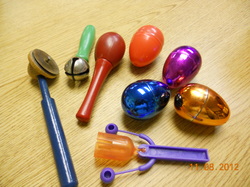
I have made our own egg shakers to add to our music box. They are their favorite to play with, especially the little ones. Just use your easter eggs and fill with rice or beans. You can also fill them with different items and ask the children if they hear different sounds from the different items. We use them during circle time as well. Make sure you glue them shut. Make extra so the kids can bring them home.
Halloween Cat (by meetthedubiens.com)
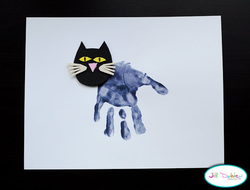
https://www.freekidscrafts.com/handprint-black-cat/
"Meet the Dubiens" has an Awesome blog and facebook page, She is so very creative.
"Meet the Dubiens" has an Awesome blog and facebook page, She is so very creative.
Dr. Seuss Hat
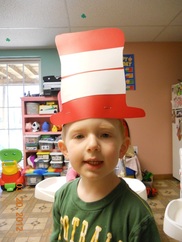
Easy enough to make. Precut the red hat out of poster board. Precut white sticker stripes. Have the kids add stripes to hat and add a strip to make a head band.
Caterpillar Clips
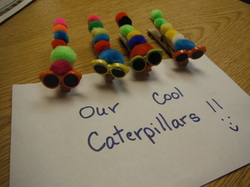
The are so cute and colorful. We made these during our Bug Theme. Its just a clothes pin with pom poms glued on and we added cool sunglasses. Added a magnet to back to use on frig. Also use for Eric Carles Hungry Catepillar Theme.
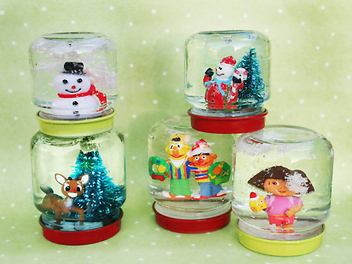
Snow Globe
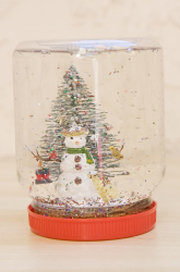
Is there anything more enticing to a young child than a snow globe? They're associated with holiday celebrations, with glitter and water, and most kids love them. Unfortunately, they're also expensive and delicate, a combination that often renders them off-limits to children. Here's a Christmas snow globe that your kids can not only play with – they can make it themselves!
What You Need:
Clean jar with a water-tight lid (test it by filling it with water, turning it upside down, and holding it over your sink)
Festive, waterproof figurine or holiday ornament that fits inside the jar
Cork
Knife
Waterproof glue (such as superglue)
Water
Coarse glitter
Ribbon
Glycerin (optional: available at drugstores)
What You Do:
Trim the cork so one piece is just taller than the jar lid. Discard extra cork.
Remove the lid from the jar and set jar aside.
Put the lid upside down and help your child affix the cork piece to the center with a dab of waterproof glue.
Glue the figurine, bottom down, to the cork (if you're using a little person as the figure, glue the feet to the cork). The cork is a platform that will allow the figurine to show above the rim of the lid, and the lid will eventually be the bottom of the snowglobe.
Let cork and figure dry completely.
Have your child add a few dashes of glitter to the jar, along with a few drops of glycerin if you’d like the glitter to fall slowly.
Help your child fill the jar almost to the top with water.
Screw lid back on jar, so the figure is pointing down. Reverse the jar so the figurine is right side up.
Tie a ribbon around the jar lid and knot decoratively.
Have your child shake gently and watch the glitter fly! Watch carefully for leaks and store on a waterproof saucer, just in case.
Not only is this homemade globe a hit for kids, it also makes a great holiday gift for friends and relatives, so stock up and make several!
http://www.education.com/activity/article/Snowglobe/
Tissue Paper Candle Holder (www.education.com)
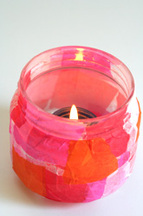
Tissue Paper Candle Holder: A Gift Kids Can Make
Looking for a last minute present? This homemade hurricane candle holder is a breeze to make, and its pretty glow really brightens up a table or mantle. Get kids crafting! All you need is some tissue paper, glue, a paintbrush, and an old jar.
What You Need:
colored tissue paper
pressed flowers or leaves (optional)
white school glue
small plastic bowl or disposable container
paintbrush
glass jar
markers
What You Do:
Give your child a few sheets of tissue paper and ask her to rip it into small pieces (2-3 inches). In the small bowl or container, mix ½ cup of white glue with 1 ¼ cups of water. It should form a thin white solution. Give your child the paintbrush and have her cover a section of the jar with a thin coat of glue solution. Repeat, overlapping the tissue paper pieces, until the entire jar is covered. Talk to your child as she works about the different colors formed as she overlaps the tissue (for example, yellow and blue make green, red and blue make purple). When the entire jar is covered, overlay a few pressed leaves or flowers (if you’re using them), and cover each with a thin coat of glue solution. If she’d like, let your child add some final touches with her markers—a personal message, her name, or some drawings. Then place a votive candle inside your new hurricane and wrap it up! When the candle glows, it will illuminate the tissue paper and designs, allowing light to shine through them.
You can also use a vase with this same technigue.
http://www.education.com/activity/article/tissuepapercandleholder_kindergarten/
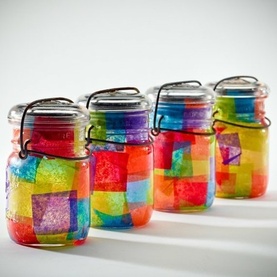
Mother's Day Decoupage Salt & Pepper Shakers
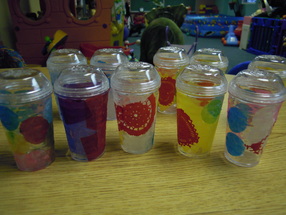
Doucoupage is so simple and beautiful, the kids love it. This year we have made salt & pepper shakers. We used tissue paper squares, tissue paper circles, and hearts cut from paper doilies. They came out Wonderful.
Clay Hearts

This cute hanging clay heart decoration was also very simple. I added a small piece of styrofaom inside and then mini flowers. The finished it with a heart sticker.
Poem Hand Prints
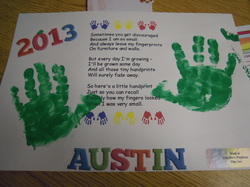
These are priceless keepers for Mothers Day.
Poems:
1:
Sometimes you get discouraged
Because I am so small,
And always leave my fingerprints
On furniture and walls.
But everyday I am growing,
-I'll be grown up someday,
And all these tiny handprints
Will simply fade away.
So here's a final handprint
Just so you can recall,
Exactly how my fingers looked
When I was very small.
I love you!
2:
I know you wipe some away,
But these handprints were made to stay.
So keep them forever, a treasure they’ll be.
A special “I Love You”, for you from me.
3:
My Handprints
Sometimes I might upset you
Because I am so small
And always leave my fingerprints
on furniture and walls.
But everyday I grow a bit
And soon I'll be so tall
That all those little fingerprints
Will be so hard to recall.
So here's a special handprint
Just so that you can say
This is how my fingers looked
When I placed them here today
4:
My Handprints
My dirty little handprint
I've left on every wall
And on the drawers and tabletops
I've really marked them all
But here is one that won't rub off
I'm giving it to you
Because I am so thankful
For a (mother/father/gran) just like you!
5:
My Hands
These little hands can wave Hello
Or put smudges on the wall
They can fold in prayer, throw a kiss
Or reach up so very tall
They'll clasp your hand for a little stroll
Or shape a ball from clay
But most of all, they'll stay with you
When I'm grown up and far away
6:
My Handprints
There used to be so many
Of my finger prints to see
On furniture and walls and things
From sticky, grubby me.
But if you stop and think awhile
You'll see I'm growing fast
These little moments disappear
You can't bring back the past.
So here is a small reminder
To keep, not throw away
Of tiny hands and how they looked
To make you smile someday.
Mother's Day Hand Print Poem
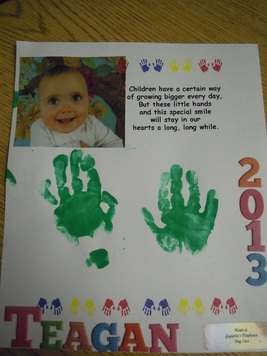
Great Infant and toddler mothers day crafts. Hand Prints & Poems are always a hit.
1:
Children have a certain way
of growing bigger every day,
But these little hands
and this special smile
will stay in our
hearts a long, long while.
More Poems:
2:
Footprint Poem ( I always do hand prints for Mom and foot prints for Dad)
The pitter patter of little feet
Leave behind something dear and sweet
A precious treasure for me to keep
The memories of your little feet.
Foot Print # 2
Daddy, daddy I have made, Prints of my little feet.
Then you can remember when, I was so small and sweet.
I will grow and baby days will all be in the past,
But you can know my love for you, Daddy will always last.
3:
My Handprints
Tiny handprints grow so fast
Their awkward groping soon will clasp
A ball, a book a sweetheart's hand
A diploma, briefcase, a wedding band
Tiny handprints grow so strong
It doesn't take them very long
To snap a shirt, to paint, to draw
To work hard , to drive a car
Tiny handprints grow to be
A person that is quite unique
A wonderful mix of so many things
With his own feelings, thought and dreams
Tiny handprints grow to rely
On his parents to bring him up just right
His parents pray that when he's grown
He'll say their job has been well done
Tiny handprints are ours to love
The sweetest gift from God above
A miracle that never is surpassed
How sad they grow up way to
4;
Handprint Poem Idea :
Children have a certain way
of growing bigger every day,
But these little hands
and this special smile
will stay in our
hearts a long, long while.
5:
Handprint Poem Idea :
This is my hand.
My hand will do
A 1000 loving things with you
And you will remember
When I am tall..
That once my hand
Was just this small.
6:
Handprint Poem Idea :
My dirty little fingerprints
I've left on every wall,
And on the drawers and table tops,
I've really marked them all.
But here is one that won't rub off,
I'm giving it to you,
Because I'm thankful for a (mother/father/grandma/etc) just like you!
7:
Handprint Poem Idea :
Sometimes you get discouraged
Because I am so small,
And always leave my fingerprints
On furniture and walls.
But everyday I am growing,
-I'll be grown up someday,
And all these tiny handprints
Will simply fade away.
So here's a final handprint
Just so you can recall,
Exactly how my fingers looked
When I was very small.
I love you!
8:
Handprint Poem Idea :
You always
clean the fingerprints
I leave upon the wall.
I seem to make a mess of things
Because I am so small.
The years will pass so quickly
I'll soon be grown like you
And all my little fingerprints
Will surely fade from view.
So here's a special handprint
A memory that's true.
So you'll recall the very day
I made this just for you!
9:
Handprint Poem Idea :
Here is my hand
So tiny, so small
to hang somewhere
upon your wall.
10
Handprint Poem Idea :
This is the hand
You used to hold
When I was only
__ years old.
Hand Calendar
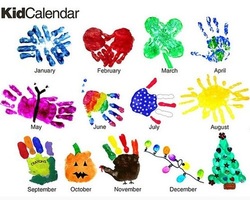
I usually make this for a parent Christmas gift. It's alot of work but Parents love it. I usually get someone to help me because with 6-9 kids, everything has to be labeled with their names, hands washed. etc. Check out the site below, there are foot picture to make. Very cute.
http://munchkinsandmayhem.blogspot.com/2012/11/kids-foot-and-hand-print-calendar.html
There are also complete instructions on this site as well. http://littlegiraffes.com/teaching-ideas/257/handprint-calendar/
This other site also has calendar pics, different pictures you can use, like a school bus for September, or a foot penguin, etc. http://christmas.yourway.net/handprint-calendar-updated/
Colored Rocks
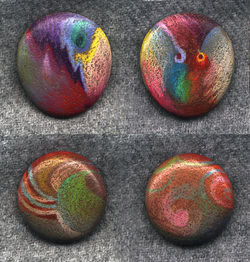
Drawing with colored pencil on rocks
I have not tried this yet but I plan on trying it over next summer.
A couple of river stones with a nice toothy texture "painted" with Prismacolor pencils.
http://donsimpson.deviantart.com/art/Two-Painted-Rocks-47543273
I have not tried this yet but I plan on trying it over next summer.
A couple of river stones with a nice toothy texture "painted" with Prismacolor pencils.
http://donsimpson.deviantart.com/art/Two-Painted-Rocks-47543273
Paper Embossing with Rubber Stamps
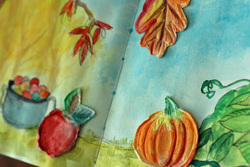
Paper Embossing with Rubber Stamps. This method is so easy. Check out the site below for details.
http://www.thatartistwoman.org/2012/10/paper-embossing-with-rubber-stamps.html
http://www.thatartistwoman.org/2012/10/paper-embossing-with-rubber-stamps.html
Babie's 1'st Christmas Ornament
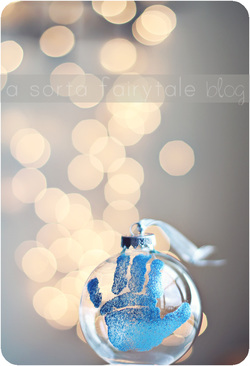
How precious is this.
All you need is:
a glass ornament ball {the color is up to you}
clear ink A.K.A embossing ink {to rub on babies hands}
embossing powder {to sprinkle over the clear ink}
q-tip {to clean it up a bit}
and heat. we used an embossing heat gun to seal it.
To this day, I'm not sure how we managed to get a clear handprint! Most babies want to clinch their first, that be warned that it will be quite the challenge!
Complete directions at the following site
http://www.asortafairytaleblog.com/2010/12/diy-babys-1st-christmas-ornament.html
Sand Impressions (by DIY) Father's Day Gift)
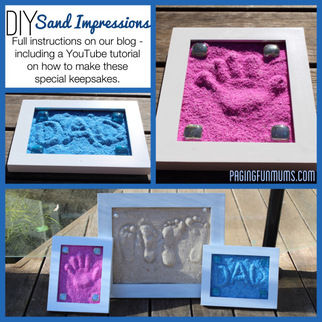
After the success of our Footprint Keepsakes we decided to try something similar using handprints, writing and Crushed ColouredGravel – This is what we came up with.
Exactly what you’ll need -
An old sheet or plastic tablecloth (to protect your work surface).
A photo frame big enough to fit the handprint or wording that you choose.
ColouredGravel Sand or Regular Sand
Glass beads for decoration
Plaster of Paris (you can find this at most craft & discount stores). I used a 1kg bag to do this sized frame and it cost $4.95.
Water for making the plaster
Cardboard to use to smooth the sand
Spray on sealer
Start by covering your work surface with something to catch the sand and any drips of plaster.
Remove the cardboard backing off the frame and carefully discard the glass from the frame (this will not be needed). Place the cardboard backing over the front of the frame and flip it over – this will create a nice box that you will then fill with sand. I used a flat piece of cardboard to smooth the sand out level with where the glass used to sit (the first inside groove).
"stamp the handprint or write the writing (the writing needs to be mirrored so it turns out the correct way).
Once I was happy with the imprints I set about mixing the plaster of paris as per the packet instructions.
Gently and slowly pour the mixture over the sand, starting in one corner and covering the whole inside of the frame then using a piece of cardboard level the mixture GENTLY – don’t press down too firmly.
Leave the plaster to set as per directions on packet or longer.
Once you’re sure your plaster has set you can remove the cardboard from the front, tip the frame over and dust off the excess sand. I then gave it some more drying time in the sun before spraying with a sealer. This will help glue and seal any loose sand.
We have added a YouTube tutorial for you to view here. The written tutorial for the Footprints can be read here.
( for all the step by step pictures go to the site below)
http://pagingfunmums.com/2013/08/19/diy-sand-imprints/
Crayon Leaf Mobile (By ://www.graciousrain.com)
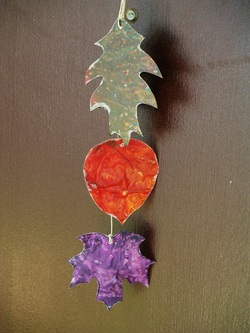
You’ll need:
Wax paper
Crayons
Scissors
Pencil Sharpener
Black Permanent Marker
Iron
Hole Punch
String
First, print out this pdf, of a few outlines of leaves.
Get out your black marker, and trace the leaves on a sheet of wax paper.
Lay out your sheet of wax paper with the leaves on it, on your ironing surface. Put a sheet of clean paper underneath to protect your ironing board.
Then, start sharpening! (And please ignore the scorch marks on my ironing board while you’re at it.)
I tried to make my shavings all pretty and in the lines. Don’t bother, it’s a pain, and totally doesn’t make a difference. Just have fun mixing colors, and then just spread them evenly over the leaf shape on the waxed paper. This is a fun way to teach kids about monochromatic colors, complimentary colors, warm colors, cool colors, etc. Oh, and if you mix too many colors, well, you’ll end up with brown. Just a warning.
Place the 2nd sheet of wax paper over the top of your crayon shavings. Set your iron on low. Put another piece of clean white paper on top of your wax paper (to protect your iron). Then, press the iron slowly down on each of the leaves. Don’t move the iron around like you’re ironing something, just press it down, pick it up, move it, place it down again. If you move it, it will smear your crayon wax everywhere, and you’ll have a mess. Trust me on this.
Please note the lovely brown patch. I told you. Too many colors=brown.
Now, cut out your leaves! If you do this part while they’re still warm, they will be easier to cut, but they cool quickly. Don’t worry if your wax paper starts to lift a little on the edges, just put your cut out piece back between the clean paper, give it a little press with the iron, and voila! Sealed up again!
Poke some holes in your leaves, tie some string…
and hang up somewhere pretty!
http://www.graciousrain.com/2009/09/12/crayon-leaf-mobile/

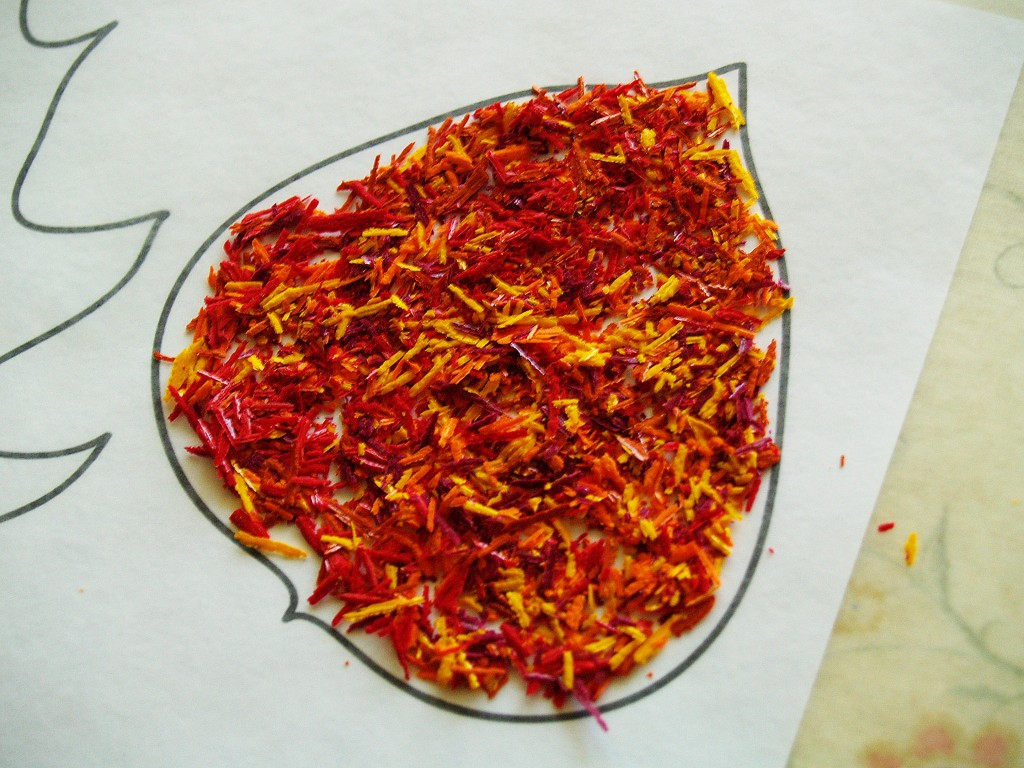
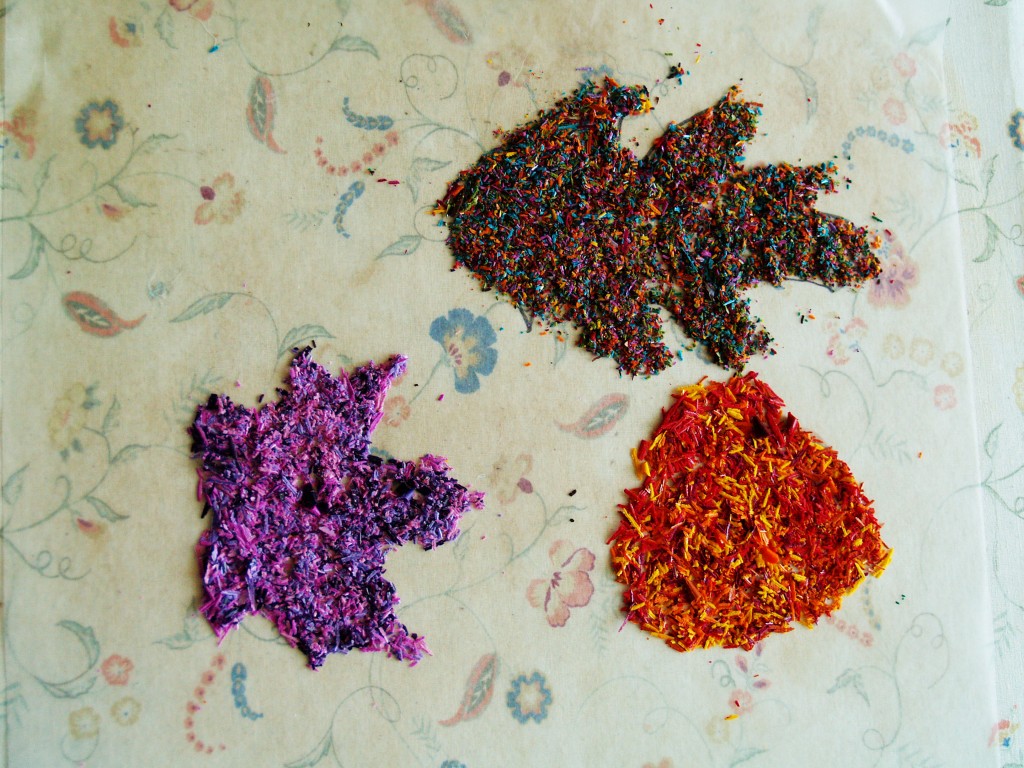

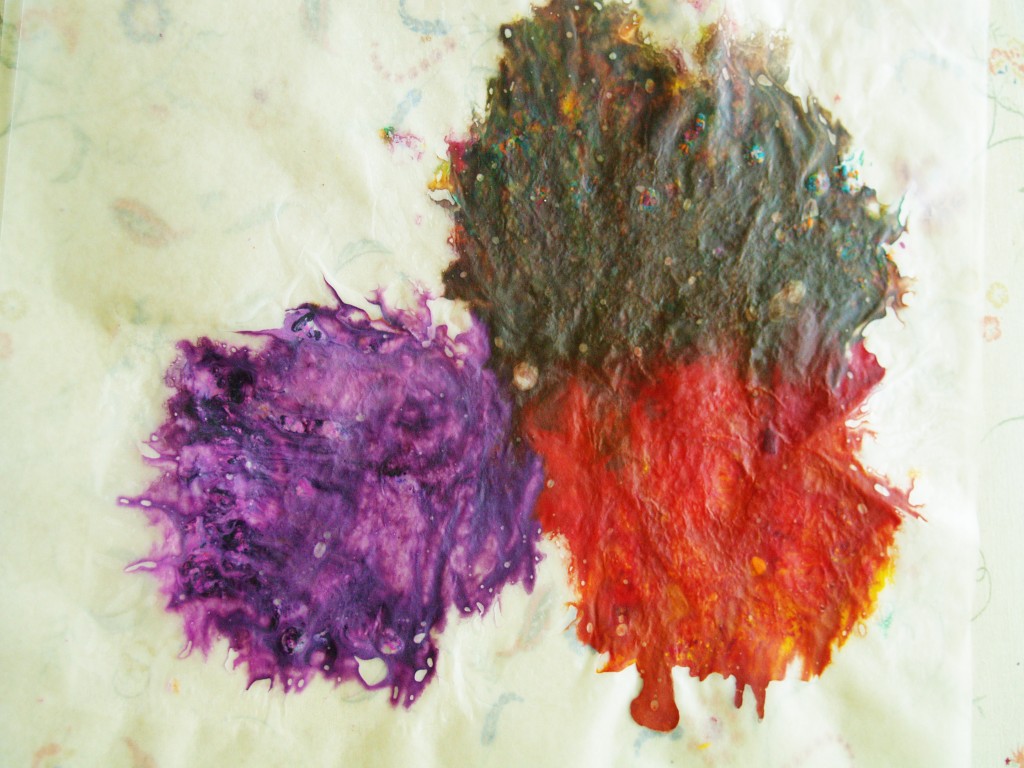
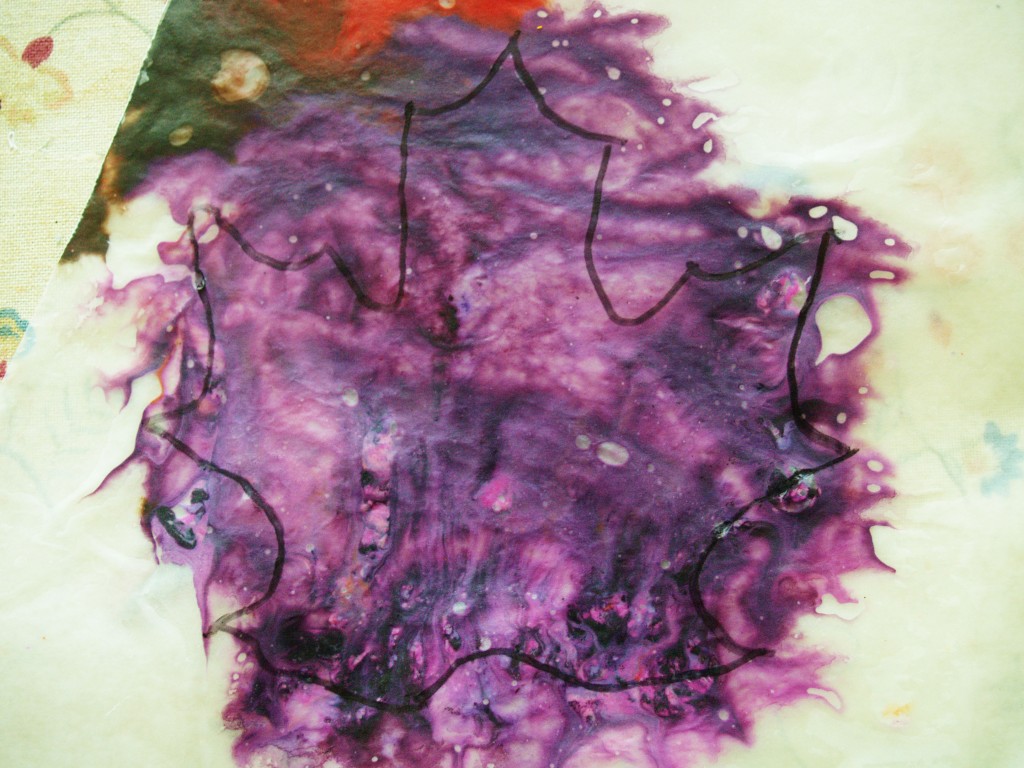
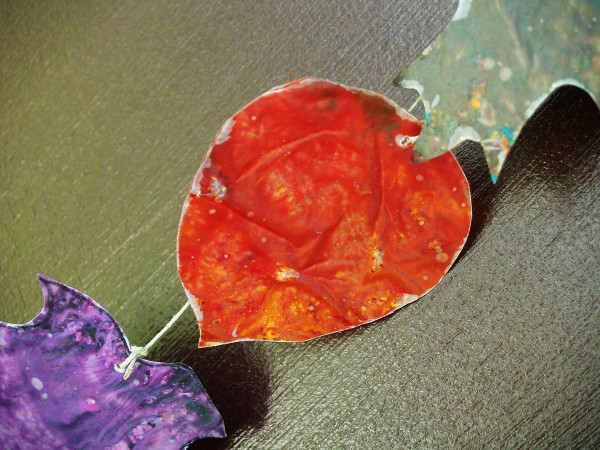
Chicka Chicka Boom Boom Tree
This tree is made with their hands and feet. Then add foam sticker letters for their name. Real Cute!
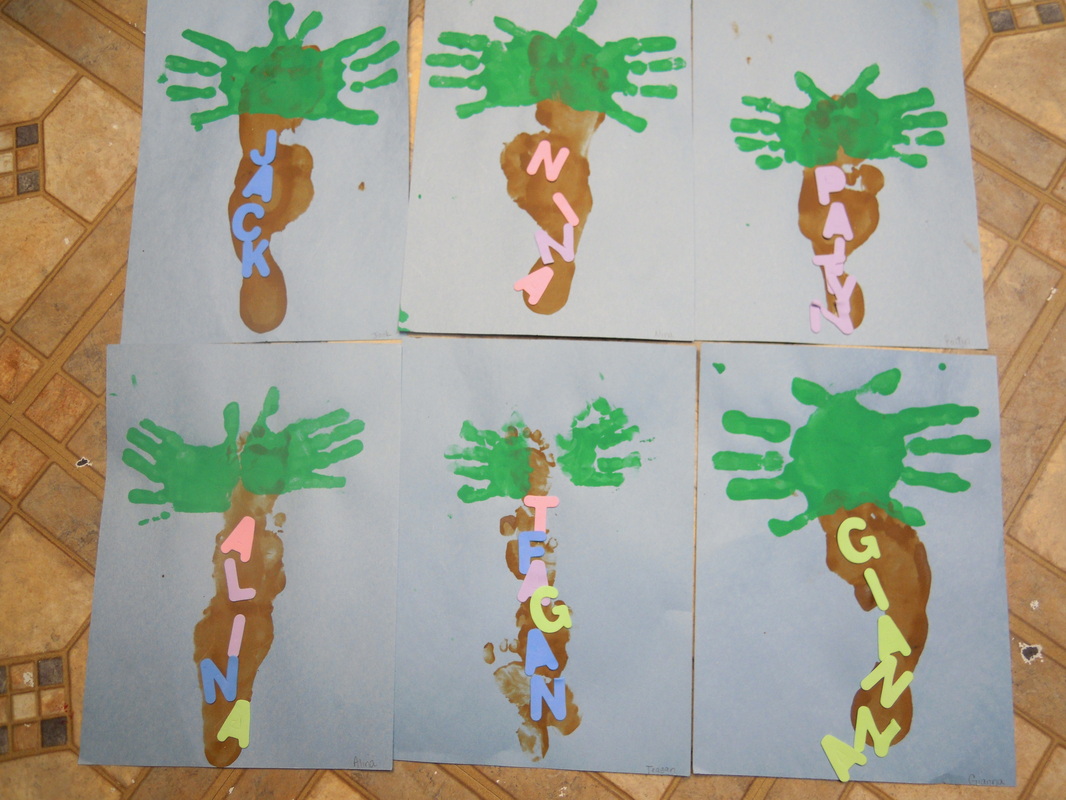

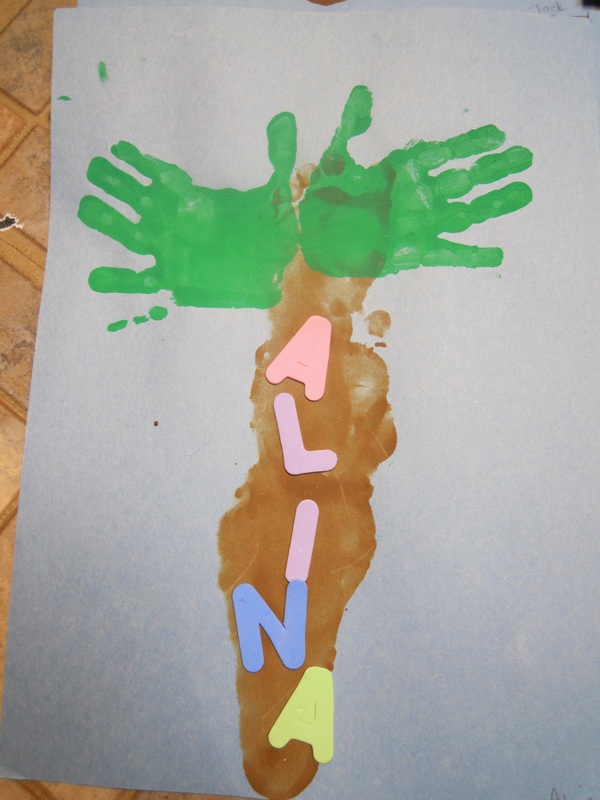
Toothbrush Painting (By BusyMommyMedia.com)
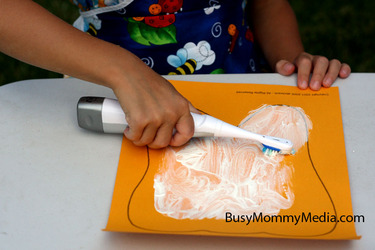
Dental Health Theme
Toothbrush painting is a fun twist on traditional painting and is a great way to teach toddlers and preschoolers about the importance of dental health. This activity was so much fun. I used a regular toothbrush because I was afraid an electric one would splatter paint everywhere. I cut out the tooth shape first and added a glob of paint and then I added toothpaste to their toothbrushes and had them paint it.
What You Need
Tooth template
Yellow paper
Toothbrush (regular or electric)
White paint
toothpaste
What to Do
Kids often don’t understand why it is so important to brush their teeth well at least two times a day. Many kids rush through brushing their teeth and miss spots that can develop into cavities. Kids can develop a better understanding of why they need to brush their teeth thoroughly every time by seeing a visual demonstration.
Give each child a yellow piece of paper. Tell the kids that yellow tartar can form on your teeth and cause cavities if you don’t brush it off. Put some white paint on a paper plate or in another container and instruct kids to use the toothbrush to brush the “tartar” off their paper tooth by painting it white.
As the children paint their tooth white, you can discus the importance of good dental health.
http://busymommymedia.com/2009/10/toothbrush-painting/
Flannel Board ( Felt Board) Stories-Printable
Clock Flower-Telling Time (by thefrugalgirls)
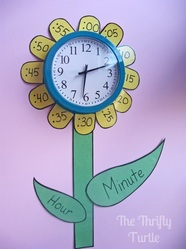
scented sandpaper gingerbread ornaments By Happy Hooligans
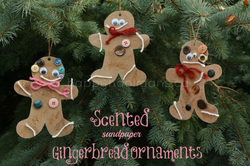
These Gingerbread Men Ornaments are so much fun to make and it makes a
great gift as well.
http://happyhooligans.ca/2012/11/20/scented-sandpaper-gingerbread-ornaments/
great gift as well.
http://happyhooligans.ca/2012/11/20/scented-sandpaper-gingerbread-ornaments/
Wet Chalk Tape Resist Easter Egg Painting (by momto2poshlildivas)
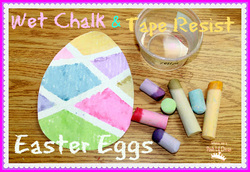
Wet Chalk Tape Resist Easter Egg Painting
My preschoolers love drawing with chalk - on our chalkboard, on the pavement outside, on our classroom writing table and of course on paper. I just knew they would enjoy drawing with wet chalk. So, when I was planning some Easter activities I decided to combine two (2) things they enjoy - chalk and tape!
Wet Chalk Tape Resist Easter Egg Painting
I cut out large egg templates from card stock. Then I provided the children with the template, tape, scissors, chalk and some water. The children used the tape and scissors to make a design on their egg template.
Once they had their desired design, they began using their chalked dipped in water to paint.
I loved all the colorful eggs that the children made. Some separated colors by sections using many colors, some used 2 or 3 colors and others just happily scribbled many different colors all over the eggs. Whatever their chosen method - they all enjoyed the process and each egg was unique.
http://www.momto2poshlildivas.com/search/label/Preschool%20Classroom
Valentine's Day Colored Glue Heart Art (by momto2poshlildivas)
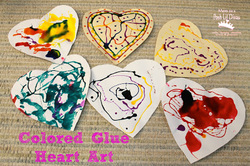
Kids Art: Colored Glue Heart Art Valentines
My preschoolers love glue. Correction - they love squeezing out all the glue from our glue bottles. Which is why they always enjoy when I mix up our glue with liquid watercolors to make colored glue for them to paint with.
They had so much fun making
Colored Glue Heart Art
To make our colored glue I add a few drops of Liquid Watercolor to our Elmer's white school glue and shake so that it mixes well. Then I just let the children paint and create to their hearts content.
They enjoy making designs, mixing colors, swirling and squeezing out as much glue as they possibly can. It's a great fine motor workout for those little hands!
Once the masterpiece is complete, put it somewhere safe to dry. Depending on how much glue is used it might take awhile to dry.
Once dry, the glue is shiny and has such a neat look to it. It makes for a lovely piece of art.
Happy Colored Glue Painting!
http://www.momto2poshlildivas.com/search/label/Preschool%20Classroom
Water Gun Painting
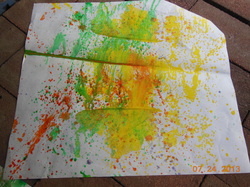
I saw something similar online and it sounded like fun so we tried it. It was lots of fun. I had a real hard time with letting them use water guns because guns are not allowed for play at my day care. Once we discussed what we were using the water guns for they had so much fun. More pictures below. I purchased small water guns in different colors to match the color paint we were using. I mixed 1/2 paint and 1/2 water and used a plastic eyedropper to fill the watergun. We went outside, layed some paper in the grass and started our summer work of art. When I saw this online they hung up the paper on a wall or fence. I found it less messy to just place it in the grass. Cleaning out the guns was a challenge. You could refill by just adding water a few times and it will still work fine.
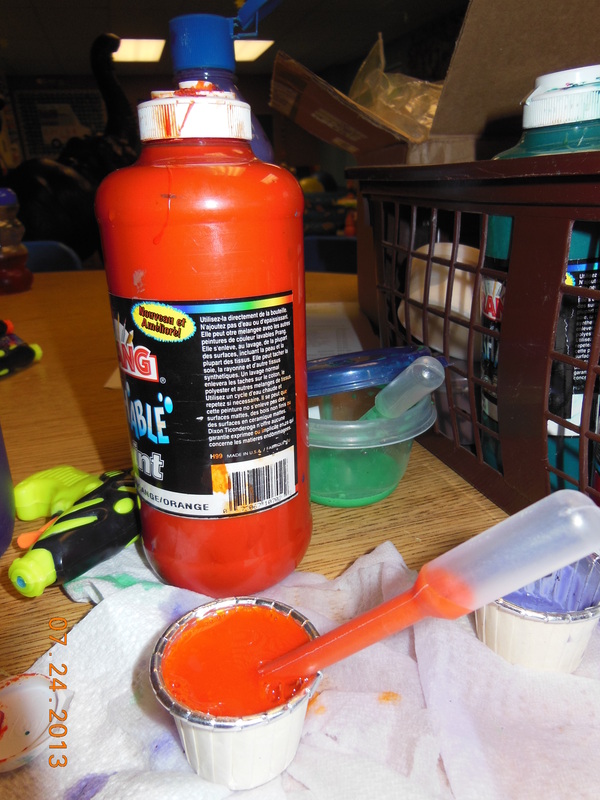
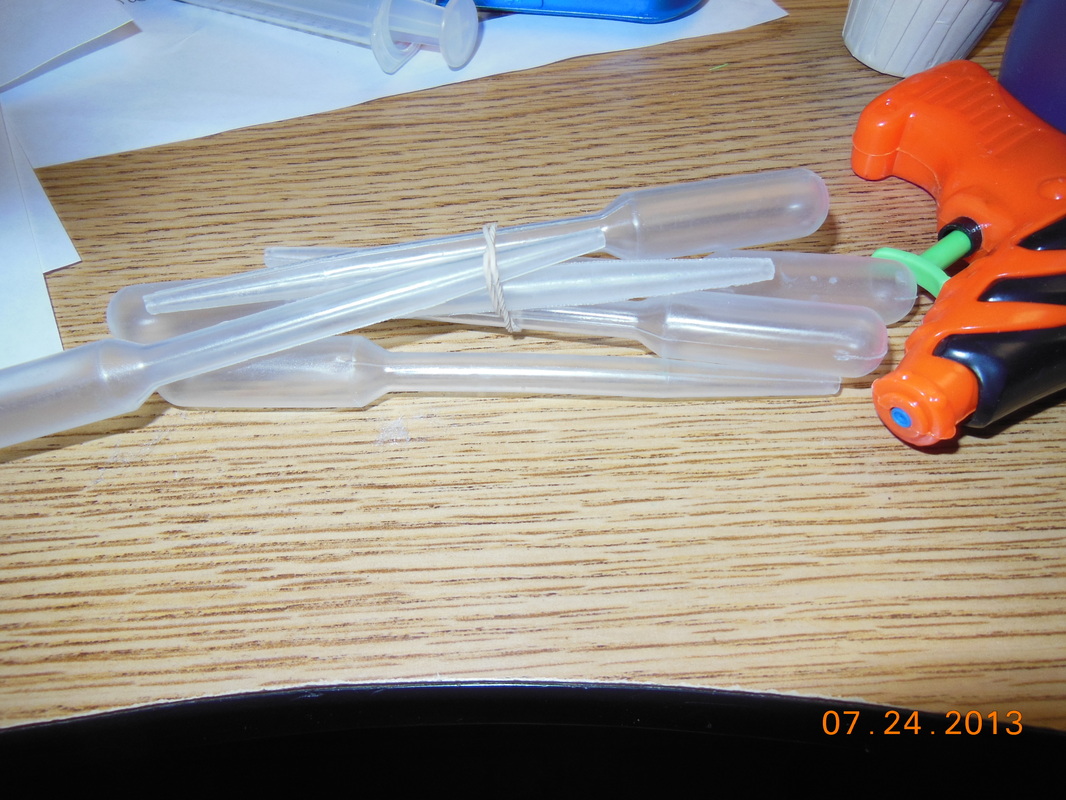
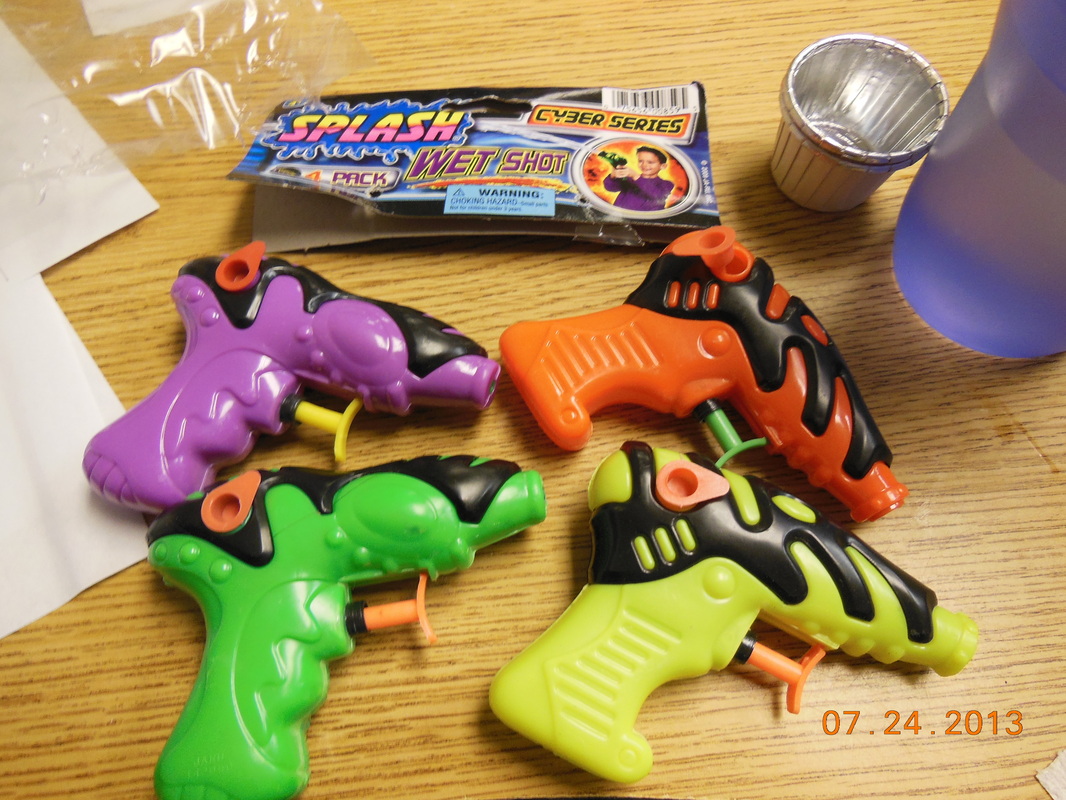

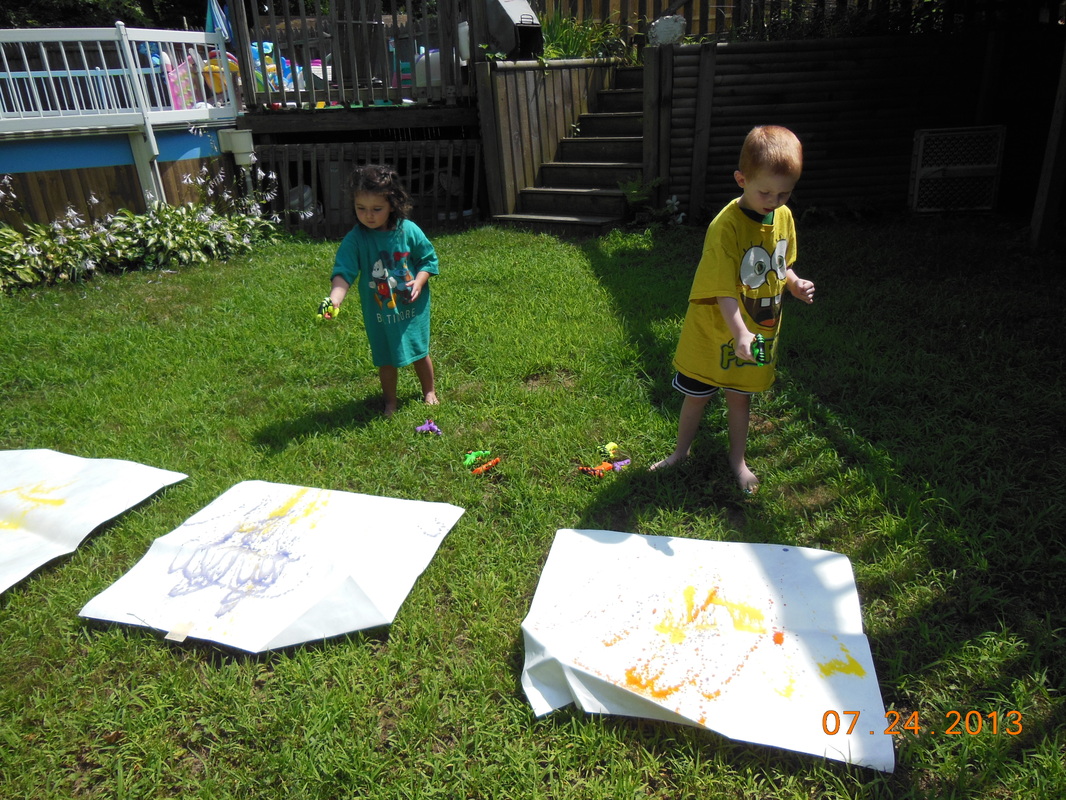

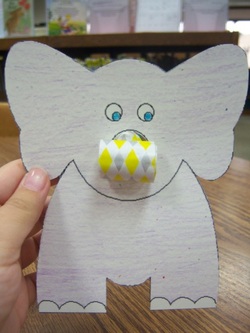
Cute Elephant Craft With A Noisemaker For The Trunk. I found this adorable craft online at http://tippytoecrafts.blogspot.com/2011/05/elephants.html The "noise"maker was hard to find, I guess most stores are just selling the blowouts that don't make noise.
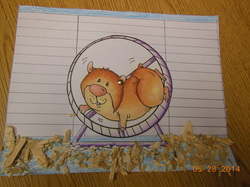
I Copied the hamster picture from here:
http://www.pinterest.com/pin/502362533406843368/
cut out hamster on wheel and put a brass fastener in middle to make it spin and added shavings . I drew the cage , pic below (copy and paste to print)
I laminated all the paper or just print on cardstock
http://www.pinterest.com/pin/502362533406843368/
cut out hamster on wheel and put a brass fastener in middle to make it spin and added shavings . I drew the cage , pic below (copy and paste to print)
I laminated all the paper or just print on cardstock
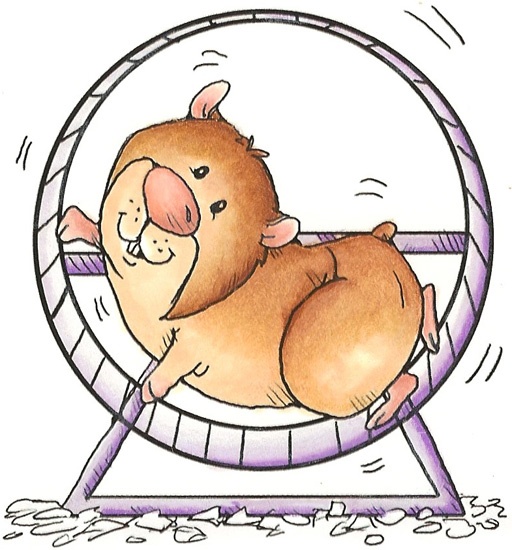
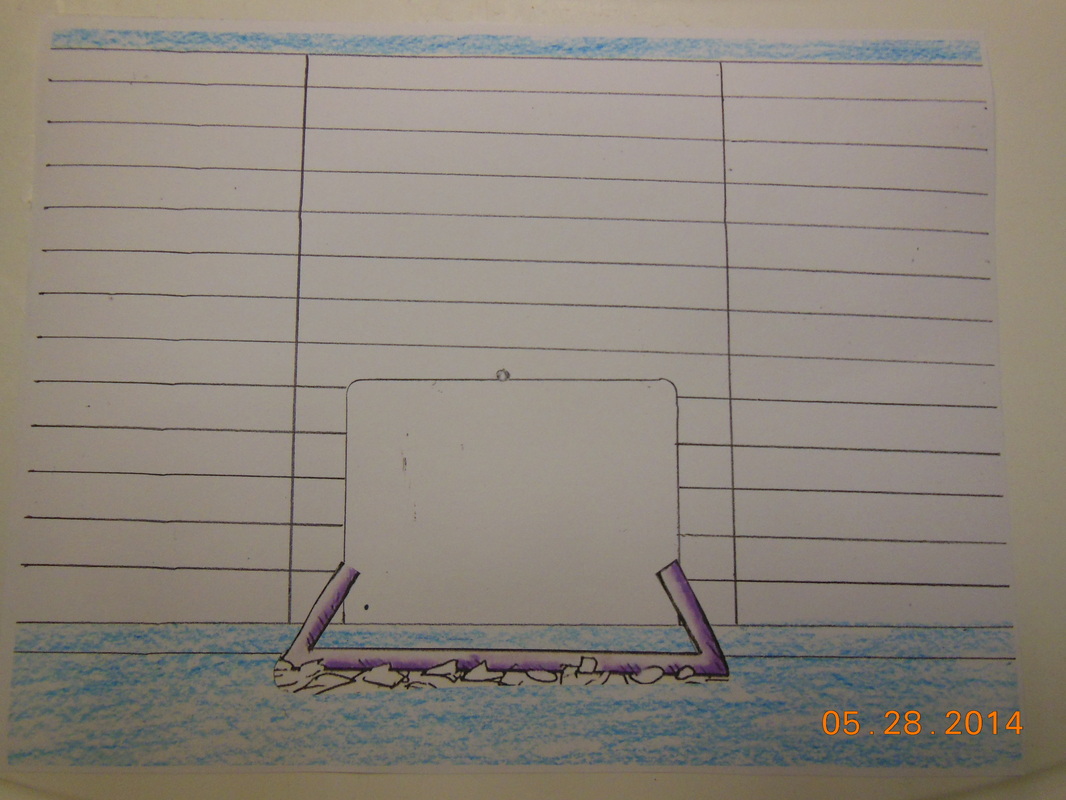
